Проблем са црним екраном у оперативном систему Виндовс 10 обично се јавља након надоградње или када аутоматизована Виндовс Упдате инсталира исправке на ваш систем. Будући да је овај црни екран највероватније хардверски проблем (ГПУ), мораћемо да проценимо и отклонимо различите поставке да бисмо га дијагностиковали и решили.

У данашње време рачунари постају све напреднији са више графичких картица за тешку употребу. Дакле, ако имате графичку картицу која није Интел-ов уграђени графички контролер , вероватно бисте имали ово покретање са проблема са црним екраном . Понекад Виндовс то узима као да су два монитора повезана са системом. Дакле, Виндовс учитава излазни сигнал на црни екран.
Пре него што пређемо на опсежно решавање проблема; треба да проверимо нека основна подешавања. Ако користите више монитора, искључите / поново повежите и тестирајте са примарним екраном. Ако ово реши проблем; имате среће. Ако не наставите са следећим корацима:
1. метод: поправите слепо
Овај метод се бави слепим решавањем проблема јер на црном екрану не можете ништа да видите.
- Када се Виндовс заглави на црном екрану, сачекајте да се на екрану појави бели курсор миша . Његово присуство можете проверити померањем подлоге за миш.
- Након што се курсор појави на екрану, притисните размакницу на тастатури и притисните тастер цтрл једном на тастатури. Унесите лозинку за пријаву или пин код слепо (не можете видети на црном екрану) . То би се пријавило у Виндовс користећи ваше акредитиве.
Ако након пријављивања на налог не видите радну површину и заглавили сте на црном екрану, притисните тастер Вин + П + тастер са стрелицом надоле (два пута) на тастатури и поново унесите детаље.
Метод 2: Циклус напајања
Ако је то лаптоп са корисничком батеријом;
- Извадите батерију.
- Искључите адаптер за напајање.

- Притисните и држите дугме за напајање 10 секунди
- Отпустите дугме за напајање.
- Повежите пуњач назад и покушајте да га укључите.

Тестирајте и погледајте да ли је проблем решен; ако не, онда пређите на 4. метод
3. метод: Искључите брзо покретање
Виндовс 10 је издат са функцијом брзог покретања. Као што и само име говори, омогућава брзо покретање оперативног система, тако да можете да наставите са радом или брзо играте.
НАПОМЕНА: Функција брзог покретања ради само када извршите искључивање, а затим укључите систем, не примењује се када извршите поновно покретање .
Да искључите опцију брзог покретања; Пратите ове коракеПокрените систем помоћу инсталационог медија за Виндовс 10. Можда ћете морати да промените редослед покретања из биоса.
погледајте: како створити покретачки медиј за Виндовс 10
- Кликните на дугме Поправи рачунар на дну
- Кликните на Решавање проблема
- Кликните на Напредне опције
Напомена: Ако овај метод не успе, покушајте да кликнете на „Врати се на претходне верзије“ и следите упутства на екрану.
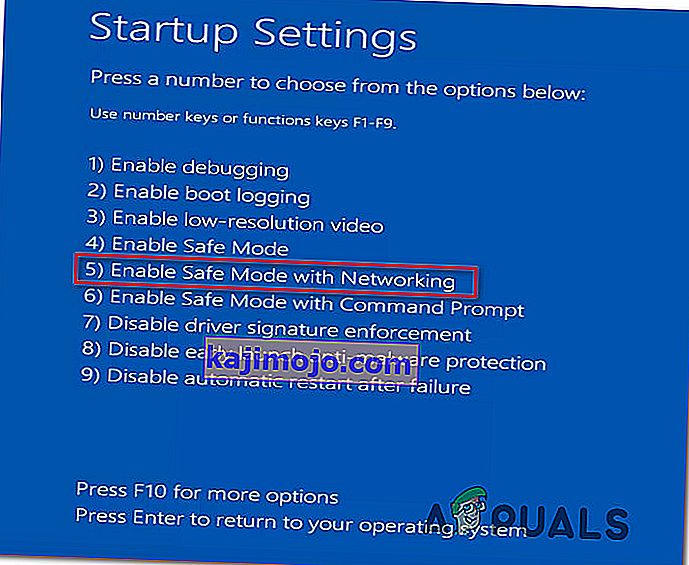
- Кликните на Стартуп Сеттингс
- Кликните на Рестарт
- Изаберите Безбедни режим са умрежавањем
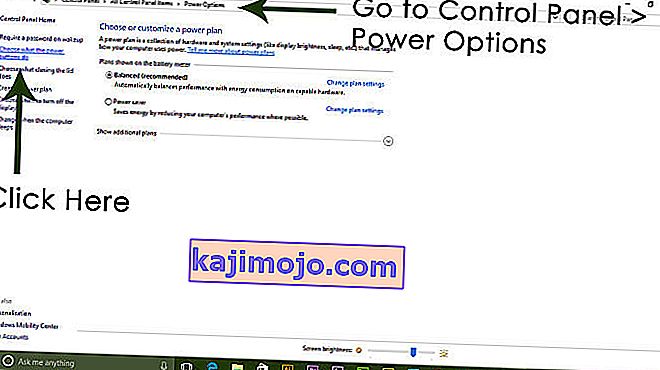
- Када рачунар почне да прелази на контролну таблу ;
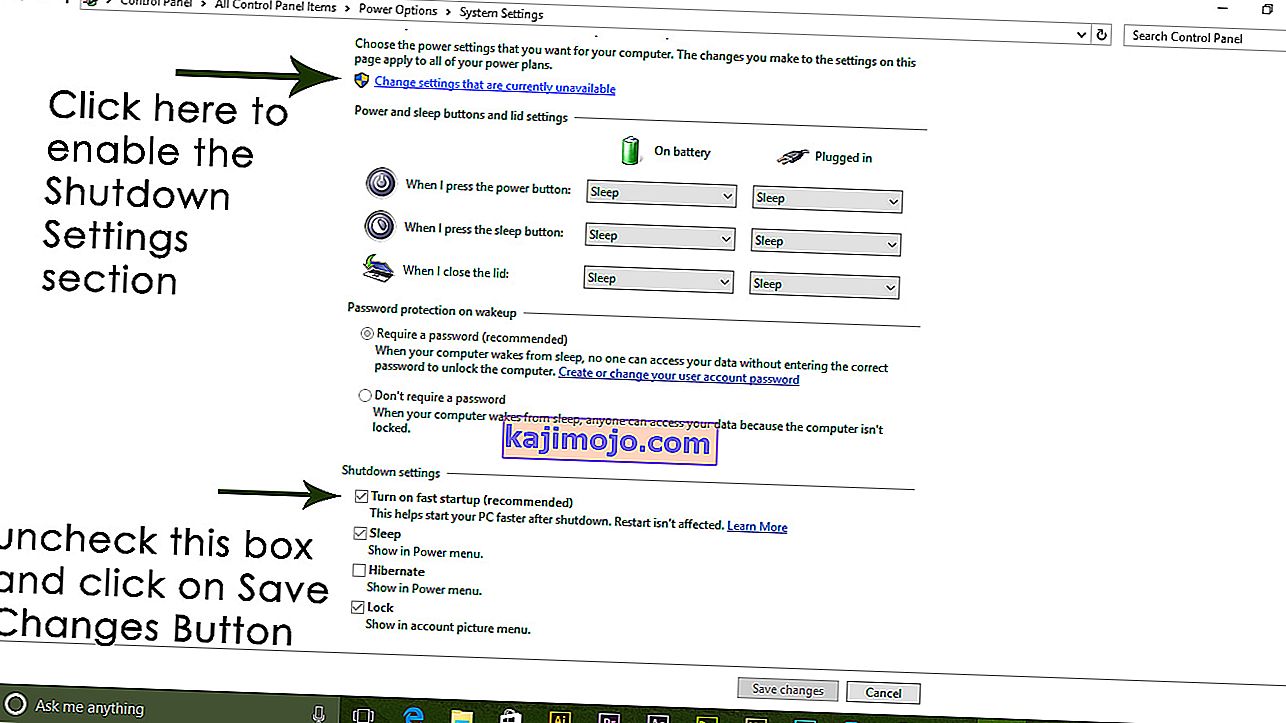
- Изаберите Опције напајања ; Изаберите Одабери шта тастери за напајање раде са ваше леве стране.

Овде се померите надоле и пронађите опцију брзог покретања и поништите је.
4. метод: Деинсталирајте адаптер за приказ
Када видите црни екран:
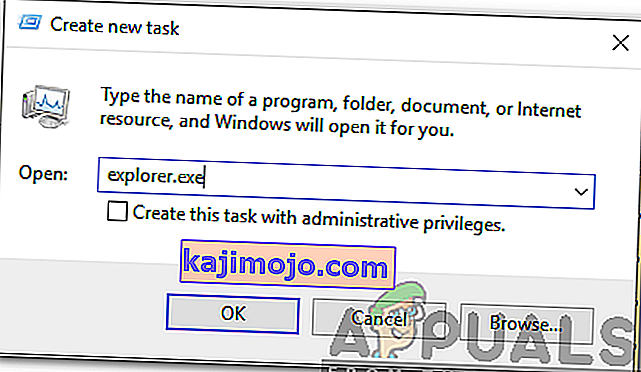
- Држите тастере ЦТРЛ + АЛТ + ДЕЛ заједно да бисте видели да ли ће се појавити Таск Манагер. Ако се то догоди, кликните на Филе -> Нев -> и унесите екплорер.еке
- Ако се отвори прозор Екплорер; пријавите се и деинсталирајте антивирусни софтвер / графичку картицу, а затим поново инсталирајте.
Напомена: Можете и да привремено онемогућите Антивирус уместо да га деинсталирате.
- Да деинсталирате адаптер за графику / приказ; ако је ЦТРЛ + АЛТ + ДЕЛ успешан и видите прозор истраживача, држите тастер за победу и притисните Р.
- Укуцајте хдввиз.цпл и кликните ОК
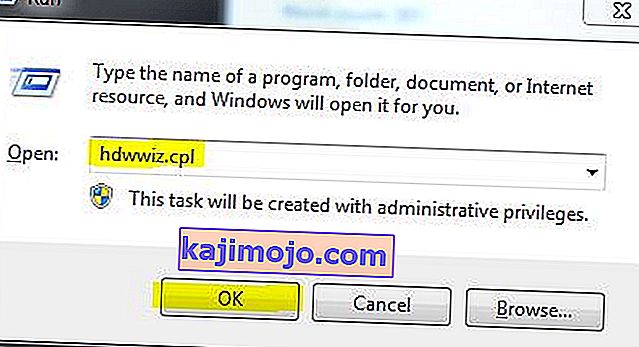
- Забележите име вашег адаптера екрана;
- Проширите Адаптери екрана -> Изаберите Деинсталирај


Након што је деинсталиран, идите на локацију произвођача да бисте преузели најновији управљачки програм. Поново покрените и ТЕСТУЈ
5. метод: Вратите систем на фабричке вредности
Овим методом ће се избрисати сви ваши подаци и ставити / инсталирати оригинални оперативни систем који сте добили уз рачунар. Пошто постоји корупција; а ако подаци нису битни, можемо их вратити на фабричке вредности, а затим извршите чисту инсталацију оперативног система Виндовс. После овог можда више неће бити опције надоградње.
Погледајте упутства за систем за упутства за враћање фабрике.
6. метод: Једноставно поново покрените рачунар
Неки корисници оперативног система Виндовс 10 који су патили од проблема са црним екраном у прошлости извештавају да су једноставно искључивање рачунара помоћу дугмета за напајање и поновно покретање поново направили трик и решили проблем за њих. Колико год звучало бизарно, ово решење свакако вреди покушати.
Метод 7: Ажурирајте управљачке програме за ГПУ на најновије верзије
Windows 10 is a big step up from the previous versions of Windows, which is why all GPU manufacturers had to create entirely new drivers designed specifically for the new Operating System. Not having the updated Windows 10-compatible drivers on your computer is another thing that can cause your computer to be affected by the black screen issue. If outdated drivers are behind the black screen problem in your case, all you need to do is go to the official website of your computer manufacturer or your GPU’s manufacturer and download the latest drivers for your GPU (they should be available in both locations). Make sure that the drivers you download are specifically designed for Windows 10 to ensure the success of this solution.
Method 8: Change your laptop’s plugged in brightness to anything but 100%
On laptops that had high-end graphics cards and were updated to Windows 8, the black screen issue often presents itself when they are plugged into an AC power outlet. If that is the case, simply opening the Start Menu, searching for Advanced power settings, opening Advanced power settings and changing your laptop’s screen brightness when plugged into anything except for 100% (even 99% will do) will get rid of the black screen problem.
Method 9: If you have two graphics cards, disable the onboard one
A decent fix for the black screen issue for people whose computers have tow graphics cards – the onboard graphics card that came with the computer and the graphics card that they have added to it (such as an Nvidia or AMD graphic card) – is to simply disable the onboard graphics card. Apparently, having two graphics cards on a Windows 10 computer can result in a clash that consequently gives birth to the black screen issue. If that is the case, simply going into Device Manager, expanding the Display adapters section, right-clicking on the onboard graphics card and clicking on Disable should fix the issue.
If you do not see your onboard graphics card in the Display adapters section, click on View in the top left of the Device Manager dialog and click on Show hidden devices. This will make your onboard graphics card (or, in some cases, cards) visible, and you can then right-click on it and click on Disable.
Method 10: Refresh your computer
The infamous black screen issue on Windows 10 can also be fixed by simply refreshing your computer. Refreshing your computer has almost entirely the same effect as resetting it to factory settings, with the exception of the fact that a refresh only deletes installed programs and applications and keeps your personal data whereas a reset gets rid of everything on your computer. To refresh a Windows 10 computer, you need to:
- Open the Start Menu.
- Click on Settings.
- Out of the array of different options provided, click on Update & Security.
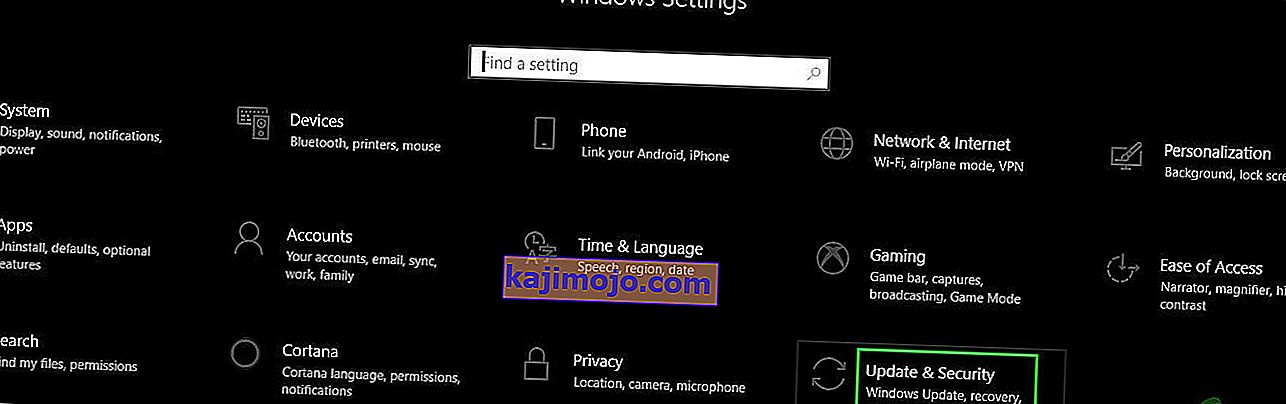
- Click on Recovery in the left pane.
- In the right pane, click on the Get started button under the Reset this PC
- When provided with a choice to either keep your files or remove everything, click on Keep my files.

Method 11: Correcting User Shell
In some cases, the User shell might be preventing the user from being able to boot safely into their computer. In certain situations, the user shell configuration inside the registry might get corrupted due to which this black screen issue can occur. Therefore, in this step, we will be correcting this user shell entry. In order to do that, follow the steps below.
- Boot your computer and wait for the black screen to appear.
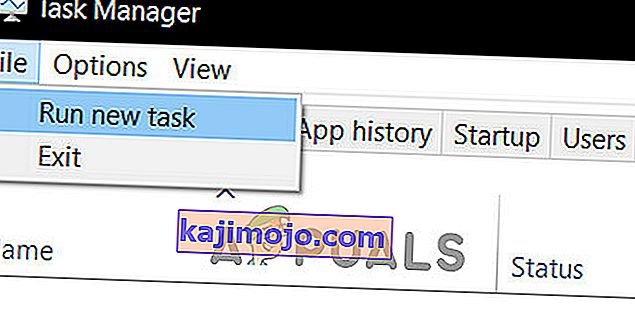
- Press “Ctrl” + “Alt” + “Del” and select the “Task Manager” option.
- Click on the “File” option on the top left of the task manager and select “Run New Task” from the list.
- Type in “regedit” and press “Enter” to open it.
Computer\HKEY_LOCAL_MACHINE\SOFTWARE\Microsoft\Windows NT\CurrentVersion\Winlogon
- Double click on the “Shell” entry on the right pane.
- Type in “Explorer.exe” in the Value data field and save your changes.
- Press “Ctrl” + “Alt” + “Del” again and click on the “Power Options” icon on the lower right side.

- Select “Restart” from the menu and wait for your computer to be restarted.
- Check to see if the issue persists after restarting the computer.


Method 12: Stopping Service
There is a specific service that prevents the computer from being able to function properly in some cases and stopping it can prevent the black screen issue from occurring. Therefore, in this step, we will be stopping this service. For that:
- Press “Ctrl” + “Alt” + “Del” and select the “Task Manager” option.
- Click on the “File” option on the top left of the task manager and select “Run New Task” from the list.
- Type in “services.msc” and press “Enter” to open it.
- Scroll through this list and look for the “RunOnce32.exe” or the “RunOnce.exe” entry. Also, do this same process for the “App Readiness” Service.
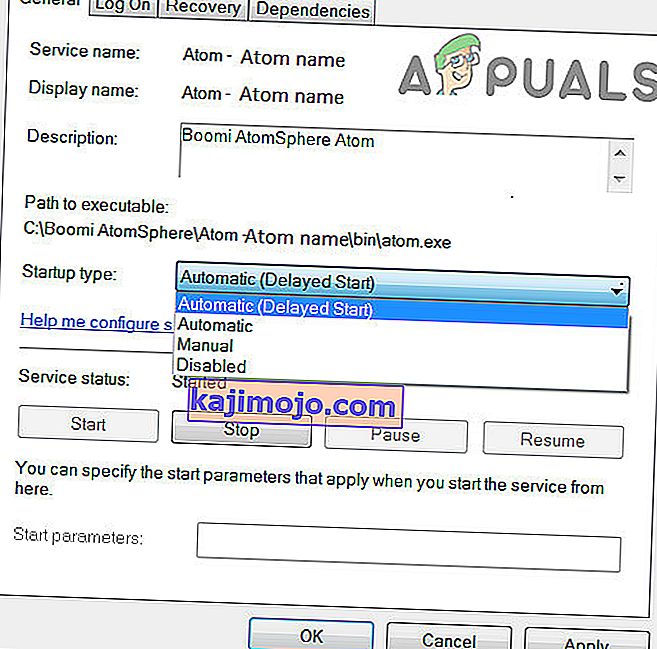
- Right-click on it and select “Stop”.
- Double click on it and change its startup type to “Disabled”.
- Wait for the service to be stopped completely and restart your computer.
- Check to see if the issue persists after stopping it completely.

Method 13: Renaming Files
In certain cases, the files in some Windows’ folders might have gotten corrupted due to which this black screen issue is being triggered. Therefore, in this step, we will be renaming these files and then check to see if the issue still persists.
- Press “Ctrl” + “Alt” + “Del” on the black screen.
- Click on the “Task Manager” option and then select “File”.
- Select the “Run New Task” option and then type in “cmd”.
- Type in the following command one by one for each file to rename it.
rename “(File Path) (File Name)” “(New Name)”
- Rename the following files to anything except their original names.
C:\ProgramData\Microsoft\Windows\AppRepository\StateRepository-Deployment C:\ProgramData\Microsoft\Windows\AppRepository\StateRepository-Deployment C:\ProgramData\Microsoft\Windows\AppRepository\StateRepository-Deployment C:\ProgramData\Microsoft\Windows\AppRepository\StateRepository-Machine C:\ProgramData\Microsoft\Windows\AppRepository\StateRepository-Machine C:\ProgramData\Microsoft\Windows\AppRepository\StateRepository-Machine
- Check to see if the issue persists after making these changes.
- If it still does, try the following code to just fix it.
cd "ProgramData\Microsoft\Windows\AppRepository" ren "StateRepository-Deployment.srd" "StateRepository-Deployment-Corrupted.srd" ren "StateRepository-Deployment.srd-shm" "StateRepository-Deployment-Corrupted.srd-shm" ren "StateRepository-Deployment.srd-wal" "StateRepository-Deployment-Corrupted.srd-wal" ren "StateRepository-Machine.srd" "StateRepository-Machine-Corrupted.srd" ren "StateRepository-Machine.srd-shm" "StateRepository-Machine-Corrupted.srd-shm" ren "StateRepository-Machine.srd-wal" "StateRepository-Machine-Corrupted.srd-wal"
- Check to see if the issue persists.
Method 14: Replacing Profile Cache
It is possible the Profile cache for your current user account has either gone missing from some locations or it has been corrupted in certain locations due to which this issue is being triggered. Therefore, in this step, we will be replacing this profile cache after copying it from a location. For that:
- Create a new user account before doing so and log into that.
- Restart your computer in safe mode.
- Log in to your new profile.
- Navigate to the following location and copy the folder named “caches”.
C:\Users\{working-user-profile-name}\AppData\Local\Microsoft\Windows\Caches - Paste this folder in the following location.
C:\Users\{broken-user-profile-name}\AppData\Local\Microsoft\Windows\Caches. - Check to see if the issue persists.
Follow the onscreen instructions and dialogs, and once you are done, your computer will have been refreshed and the black screen issue will be no more.
You can further try to:
- Boot your computer in safe mode and check if the issue persists over there. This will help you to isolate these issues from a specific app that is causing it.
- Press “Windows” + “P” to switch displays that might fix this.
- Update your Bios
- Disconnect the Second monitor
- Try to use an HDMI cable for connection instead of a DVI or VGA one.
- When in the black screen, press the “Windows’ + “Ctrl” + “Shift” + “B” keys to refresh the Graphics Driver.
- You can also try to perform a Startup Repair.
- Try to create a new user account using the last methods listed in this article.
- Извршите СФЦ и ДИСМ скенирање.