Виндовс 10 је једна од најочекиванијих верзија компаније Мицрософт. Иако је Виндовс 8 створио нови тренд у свету Десктоп ОС-а, имао је неких проблема у дизајну и перформансама који су били главни фокус Мицрософта у оперативном систему Виндовс 10. Дакле, Виндовс 10 Финал Буилд је објављен 29. јула 2015, за Десктоп као као и Смартпхоне.
Садржао је пуно модификација држећи у виду недостатке Виндовс-а 8. Заправо је реч о напредној верзији оперативног система Виндовс, али ипак постоји низ последица које се свакодневно дешавају код различитих корисника.
Главни део ових последица су грешке које се појављују приликом покушаја обављања одређеног задатка. Велики број људи је прошао кроз поруку о грешци док су покушавали да отворе различити софтвер и прегледаче унутар свог Виндовс 10. Ова грешка долази са поруком о грешци која каже да апликација није могла да се правилно покрене (0кц0000005). Кликните на дугме У реду да бисте затворили апликацију . Ова грешка се обично јавља код интернет прегледача, али није ограничена на њих. Било која апликација унутар оперативног система Виндовс може престати да реагује због ове грешке. Дакле, то треба поправити како би вратио тај основни софтвер натраг на посао.

12.11.2016: Корисници су пријавили да ће доле наведене методе радити и на оперативном систему Виндовс 7.
Разлог иза грешке Виндовс 10 0кц0000005:
Постоји низ познатих разлога који узрокују да ова грешка омета рад различитог софтвера у оперативном систему Виндовс 10. Један од разлога који се сматрају главним узроком је независни антивирусни програм који изазива сукобе са извршним датотекама и утиче на њихово пословање. С друге стране, регистри се могу оштетити због малвера и вируса због којих се програми понашају необично. Понекад су лоши управљачки програми за хардвер такође кривци који узрокују ову грешку.
Решења за исправљање грешке у систему Виндовс 10 0кц0000005:
На основу горе наведених разлога, решења су директна. Дакле, прођите кроз следеће методе да бисте се решили ове фрустрирајуће поруке о грешци.
Поправите оштећене системске датотеке
Преузмите и покрените Ресторо за скенирање и враћање корумпиране и несталих фајлова од овде , једном урадили наставити са решењима испод. Важно је осигурати да су све системске датотеке нетакнуте и да нису оштећене пре него што наставите са доњим решењима.
1. метод: Исправљање антивирусног програма
Антивирусни програми могу утицати на извршне датотеке великог броја програма. Дакле, да бисте решили овај проблем, морате да онемогућите независни антивирусни програм да бисте проверили да ли је он кривац или не. Имајте на уму да онемогућавање антивирусних програма може довести до озбиљних претњи рачунару када је повезан на Интернет.
Такође се можете ослонити на сопствени безбедносни софтвер система Виндовс, тј. Виндовс Дефендер . Има исту функционалност као и било који други антивирус. Можете онемогућити антивирус тако што ћете доћи до његових подешавања и искључити штит.

Након што је онемогућен, поново проверите да ли постоји грешка. Ако се и даље настави, пређите на следећу методу.
Метод # 2: Поправљање регистра
Регистар је централна база података Прозори који се стално користи рачунар да помогне да прочита различите датотеке и подешавања која треба да ради. Регистри се могу оштетити због оштећења одређених датотека потребних да се све стави на своје место. Стога већина стручњака препоручује да направите резервну копију регистра и да ову резервну копију чувате на уобичајеном УСБ кључу како бисте могли да оживите свој регистар у претходном стању у случају оштећења. Али, ако нисте направили резервну копију регистра, следите ове кораке да бисте поправили регистре како бисте решили грешку 0кц0000005 .
1. Преузмите софтвер за чишћење регистра са ове везе .
2. Након преузимања, инсталирајте га помоћу препоручених подешавања. Отворите софтвер након завршетка процеса инсталације.
3. На интерфејсу, кликните на картицу Регистри која се налази у левом окну и кликните на дугме са ознаком Скенирај за проблеме . Започеће претрагу грешака у регистру, а када ће претрага бити завршена, активираће се дугме Поправи изабрано издање . Кликните на то дугме и све ће бити поправљено.

Метод # 3: Исправљање неисправних управљачких програма
Управљачки програми су софтверски програми који помажу рачунару да комуницира са хардвером повезаним са њим. Дакле, када су оштећени, хардвер има тенденцију да изазове грешке . Поправљање ових неисправних ронилаца може вам помоћи на више начина. Следите кораке у наставку.
1. Отворите управљач уређајима за притиском на Вин + Кс и његовим избором из листе.
2. Унутар Управљача уређајима померите се надоле да бисте видели постоји ли хардвер са жутом ознаком. Ако постоји, кликните десним тастером миша и изаберите Ажурирај управљачки софтвер . Ако сте недавно инсталирали управљачке програме, поново их инсталирајте.

3. У прозору који се појави након, кликните на Аутоматски тражи ажурирани софтвер управљачког програма како бисте му омогућили да аутоматски претражује и инсталира управљачке програме. У случају да сте ручно преузели управљачке програме, кликните на доњу опцију да бисте их прегледали и инсталирали. Након завршетка поступка, проверите да ли постоји грешка.

Метод # 4: Исправите БЦД
Ову методу корисници треба да спроводе на сопствени ризик. Ово је некима успело, а некима није. Такође ћете морати поново да активирате Виндовс након извршавања корака у овом водичу.
- Држите Виндовс тастер и притисните Кс . Изаберите командну линију (Админ)
- Откуцајте „ бцдедит“ и притисните ЕНТЕР. Ако је ваш Виндовс Боот Лоадер Патх кОслоад.еке, тада морате уклонити неке датотеке и поправити свој БЦД. То можете видети у пољу ПАТХ након извршавања наредбе „бцдедит“.
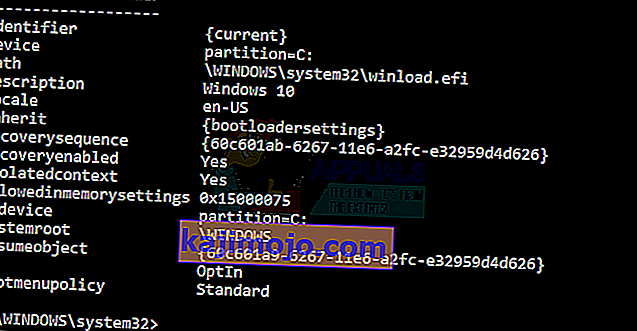
- Када завршите, извршите следеће наредбе у наставку, неке ће се можда вратити не пронађене, али игнорисати грешке и наставити до последњег. Обавезно притисните тастер ЕНТЕР након сваке наредбе.

Дел Д: \ Виндовс \ Систем32 \ кОслоад.еке Дел Д: \ Виндовс \ Систем32 \ кНтКрнл.еке Дел Д: \ Виндовс \ Систем32 \ Дриверс \ оем-дрв64.сис аттриб ц: \ боот \ бцд -х -р -с рен ц: \ боот \ бцд бцд.олд боотрец / ребуилдбцд
5. метод: Провера ажурирања за Виндовс
Ажурирања за Виндовс често садрже исправке за неке грешке и грешке, али су такође позната по томе што уступају место новим проблемима на рачунарима људи. Међутим, у овом кораку провераваћемо да ли има ажурирања за ваш оперативни систем, јер Мицрософт често закрпи проблеме који потичу из њихових исправки. Да бисте то урадили, следите доњи водич.
- Притисните „Виндовс ' + „ И “ да бисте отворили Виндовс поставке.
- У подешавањима кликните на опцију „Ажурирања и безбедност“ , а са леве стране изаберите опцију „Виндовс Упдате“ .

- На следећем екрану кликните на опцију „Провери да ли има ажурирања“ и аутоматски ће затражити од Виндовс-а да провери има ли доступних исправки.
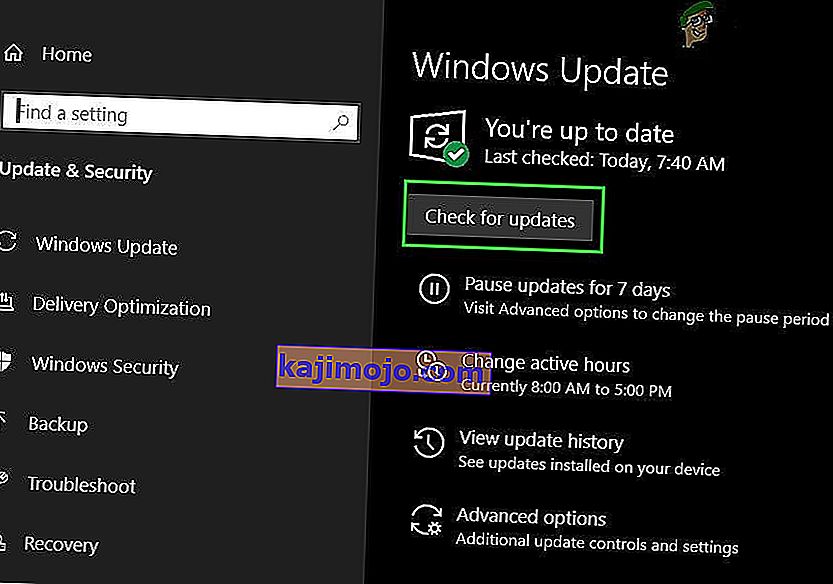
- По завршетку провере ажурирања, кликните на дугме „Преузми“ да бисте покренули преузимање и инсталирање нових исправки на рачунару.
- Након инсталирања ових исправки, проверите да ли је то решило проблем на рачунару.


6. метод: Враћање рачунара
Ако сте тек почели да добијате овај проблем, можда се покреће због неисправне инсталације управљачког програма или чак због нетачне апликације коју сте недавно инсталирали на рачунар. Стога ћемо у овом кораку вратити стање рачунара на ранији датум и надамо се да би ово требало да поправи наш проблем ако је то било због горе наведених разлога. Да би то учинио:
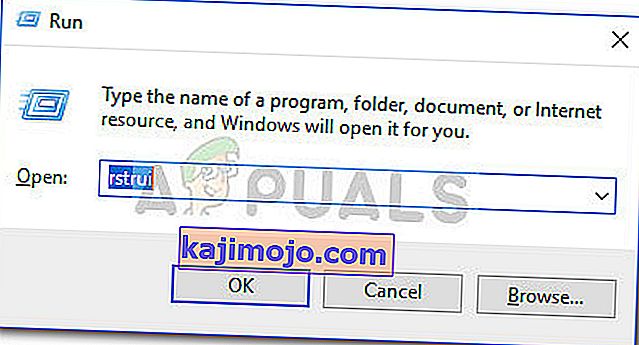
- Притисните „Виндовс“ + „Р“ да бисте отворили упит за покретање.
- Укуцајте „рструи“ и притисните „Ентер“ да бисте отворили прозор за управљање враћањем.
- Кликните на „Даље“ и означите опцију „Прикажи више бодова за враћање“ .
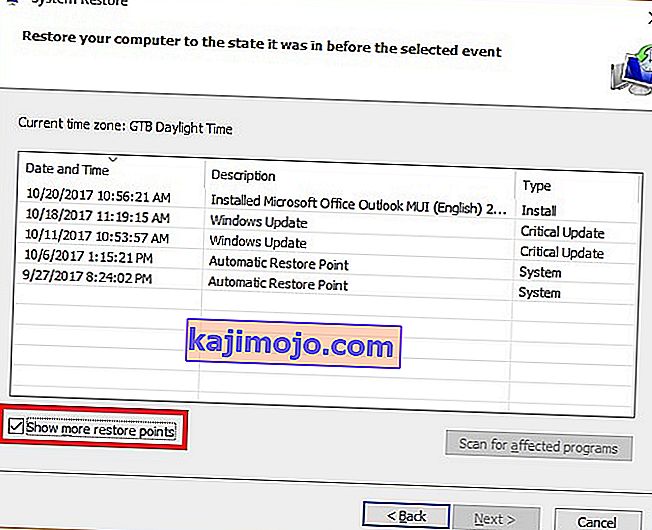
- Изаберите тачку враћања са листе која је пре датума када је овај проблем почео да се јавља.
- Поново кликните на „Даље“ и следите упутства на екрану да бисте вратили све на изабрани датум.
- Након завршетка враћања, проверите да ли се проблем и даље јавља.


Метод 7: Омогућите заштитни зид
У неким случајевима је могуће да се грешка покрене зато што је апликација сумњива или бар ако је означена као сумњива и Виндовс заштитни зид не ради на вашем рачунару да би потврдио ову сумњивост. Стога ћемо у овом кораку бити сигурни да је омогућен Виндовс заштитни зид како бисмо се решили ове грешке. За то:
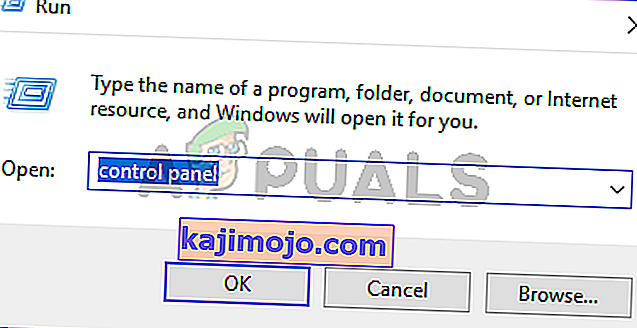
- Притисните „Виндовс“ + „Р“ да бисте отворили упит за покретање.
- Укуцајте „Цонтрол Панел“ и притисните „Ентер“ да бисте покренули класични интерфејс Цонтрол Панел-а.
- На контролној табли кликните на опцију „Прикажи према:“ и изаберите дугме „Велике иконе“ .
- Након одабира, кликните на опцију „Виндовс Дефендер Фиревалл“ да бисте покренули заштитни зид, а затим одаберите „Турн он Виндовс Дефендер Фиревалл Он ор Офф“.
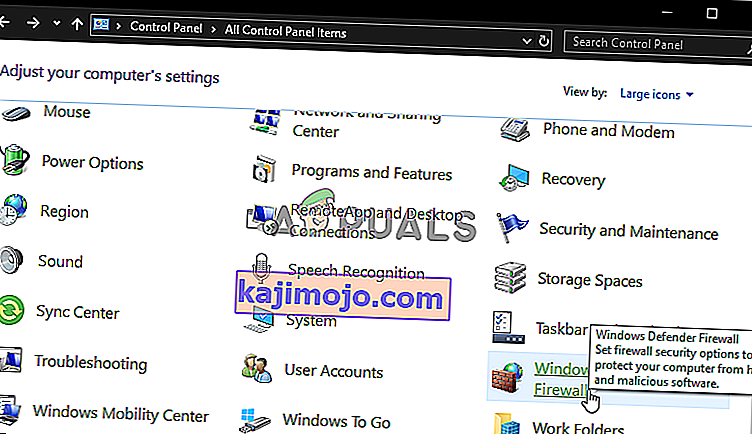
- Обавезно означите „Укључи заштитни зид Виндовс Дефендер“ за обе доступне опције за укључивање заштитног зида.
- Након избора, сачувајте промене и затворите прозор.
- Након тога проверите да ли проблем и даље постоји.


8. метод: Покрените СФЦ скенирање
У неким ситуацијама сте можда инсталирали лош управљачки програм на рачунар или у неком тренутку, због грешке у складишту, неке системске датотеке или управљачки програми су можда оштећени. Због тога ћемо у овом кораку покренути комплетно скенирање система како бисмо идентификовали управљачке програме којима недостају потписи или отклонили било какве абнормалности у системским датотекама. За то:
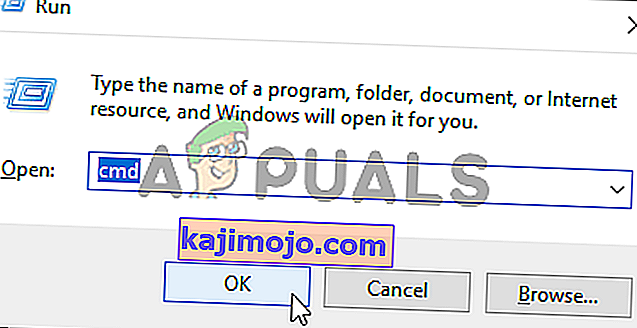
- Притисните „Виндовс ' + „ Р “ да бисте отворили упит за покретање.
- Укуцајте „цмд“, а затим притисните „Схифт“ + „Цтрл“ + „Ентер“ да бисте дали администраторске дозволе. Покретање командне линије
- Укуцајте следећу команду унутар командне линије и притисните „Ентер“ да бисте је извршили.
сфц / сцаннов
- Let the computer scan for any broken or corrupted items and it should automatically replace them with working ones.
- Check to see if doing so fixes the error message.

Method 9: Disabling Data Execution Prevention
Data Execution Prevention is a program that prevents certain programs or executables from being able to run on your computer because it suspects that they might be viruses. Due to this prevention, sometimes, as a false alarm, legit applications might also face issues while trying to run on your computer. Therefore, in this step, we will be disabling this setting from the system configuration panel. For that:
- Press ‘Windows’ + “R’ to open the Run prompt.
- Type in “Control Panel” and press “Enter” to launch the classical control panel interface.

- Inside the Control Panel, click on the “View By:” icon and then select the “Large Icons” option.
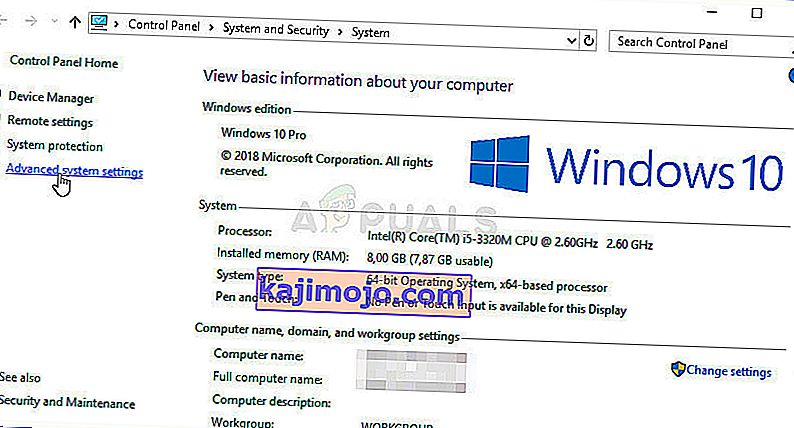
- After selecting Large Icons, select the “System” option.
- Click on the “Advanced System Settings” option on the left side of the screen.
- In the advanced System Settings, click on the “Advanced” tab from the top.
- In the advanced tab, click on the “Settings” option under the “Performance” heading.
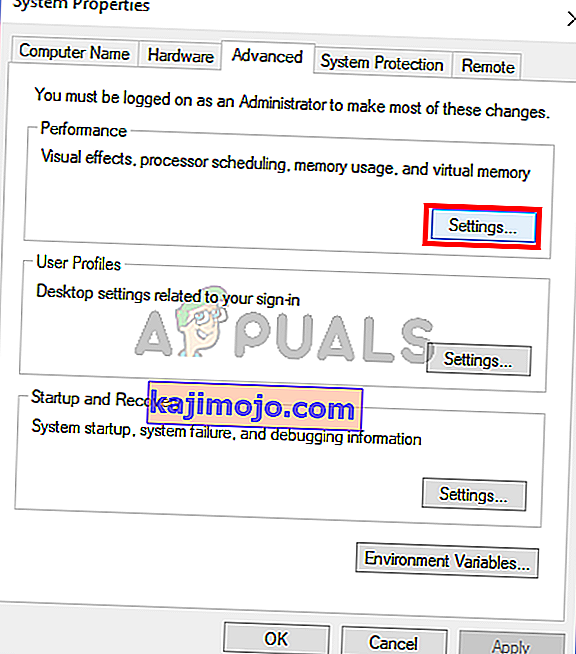
- On the next window that opens up, click on the “Data Execution Prevention” tab, and then select the “Turnon DEP for all programs except thoseI Select” option.
- After that, click on the “Add” option and point to the executable of the application that you are facing issues with.
- This way, that application will no longer come under the jurisdiction of the DEP program.
- Check to see if doing so has fixed the issue.


If the above process is unable to fix the issue, it might be because the executable isn’t the only one being affected by the DEP program. Sometimes the DEP might actually be preventing a herd of executables from being run on the computer and to counter this we will be disabling DEP completely.
Disabling DEP completely cannot be done through any Windows setting and it needs to be done manually through the command prompt. Remember to take this step as a last resort because this can in some cases makes your computer more vulnerable to viruses and malware attacks. In order to disable DEP through the command prompt:
- Press “Windows” + “R’ to open the Run prompt.
- Inside the Run prompt, type in “cmd” and then press “Shift” + “Ctrl” + “Enter” to launch in admin mode.
- Inside the command prompt, type in the following command and press “Enter” to execute it on your computer.
bcdedit.exe /set {current} nx AlwaysOff - Once the command has been executed, run the application that you want to and check to see if the error message still persists.
Method 10: Disable Firewall and Windows Defender
In some situations, the executable that you want to run on the computer might actually be blocked by the Firewall and it would not be able to make contact with its servers this way. Therefore, we will have to allow the executable in our Firewall for both public and private networks which should get it working if the Firewall is preventing it.
In addition to that, sometimes the Windows Defender might prevent the application from running on your computer because its local files might be suspicious and not properly signed. This can be due to a false alarm as well so we will be disabling the Windows Defender for the application as well by adding an exclusion. In order to do that:
- Press “Windows” + “R” to launch the Run prompt.
- Type in “ControlPanel” and press “Enter” to launch the classical control panel interface.
- Click on the “View by:” button, select “Large Icons” and then click on the Windows Defender Firewall option.
- Select the “Allow an app orfeature through the Firewall” button on the left pane and then click on the “Change Settings” button and accept the prompt.
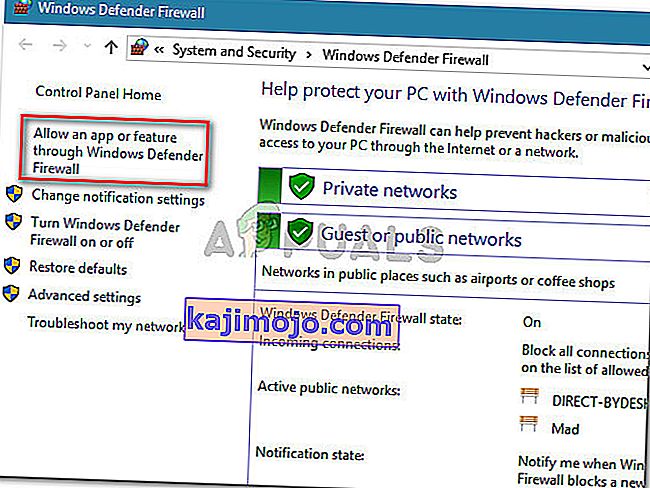
- From here, make sure that you check both the “Public” and the “Private” options for the application and its entries.
- Save your changes and exit out of the window.
- After that, press “Windows” + “I” to launch the settings and click on the “Updateand Security” option.
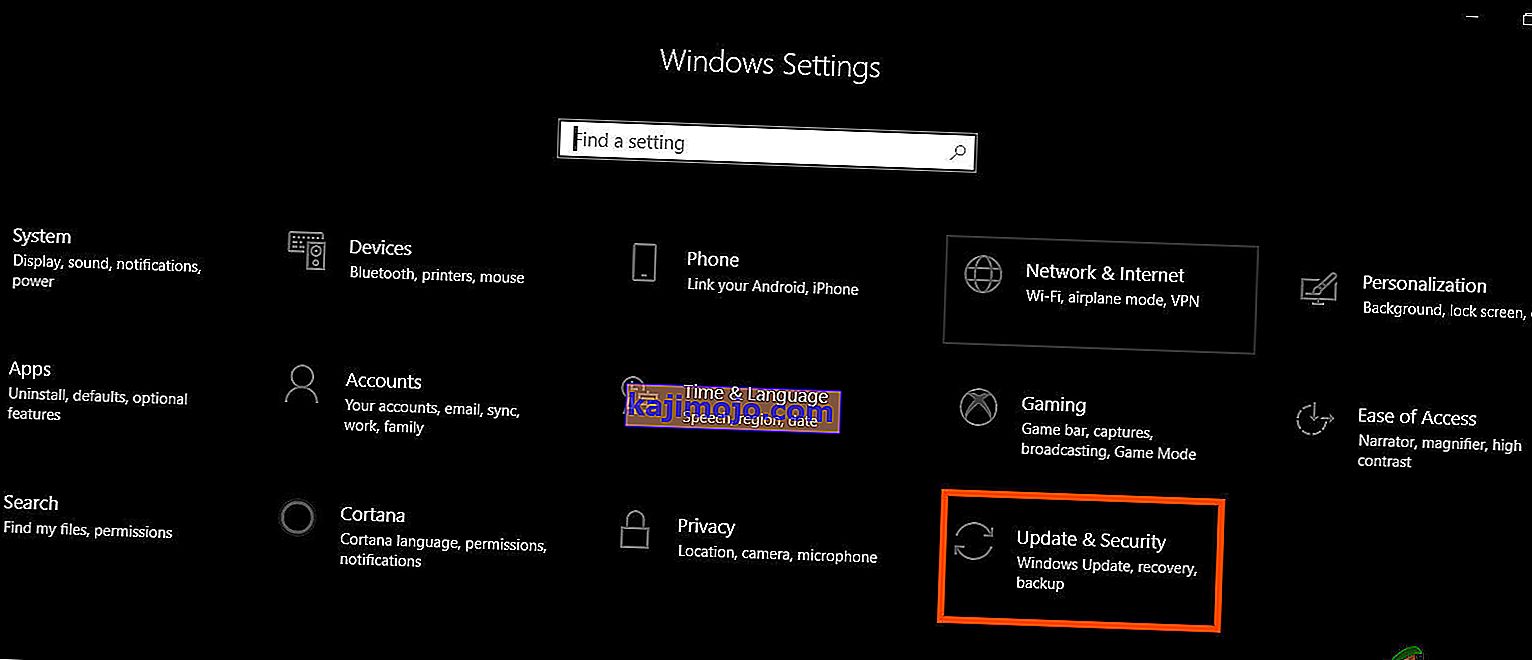
- From the left pane, click on the “Windows Security” button and then click on the “Virus and Threat Protection” button.
- Select the “Manage Settings” button under the Virus and Threat Protection Settings heading.
- Scroll down and click on the “Add or Remove Exclusions” button in the next window.
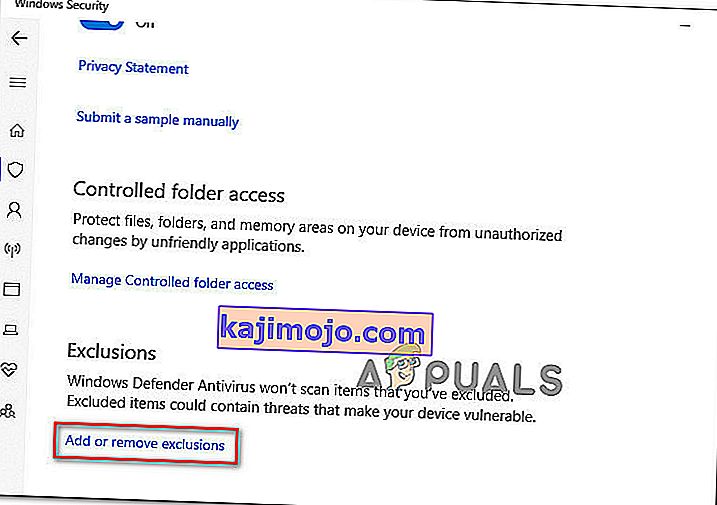
- Click on the “Add an Exclusion” option and select “Folder’ from the File type.
- Make sure to specify the application’s folder with which the issue is occurring and exit out of this window after saving your changes
- Check and see if doing so has fixed the error message.


Method 11: Reinstall Firefox
If you are getting this error while trying to launch Firefox, it might be occurring because the applications haven’t been installed properly on your computer. Therefore, in this step, we will be launching the app management window and uninstalling Firefox after which we will reinstall it completely by downloading it from the Firefox website. For that:
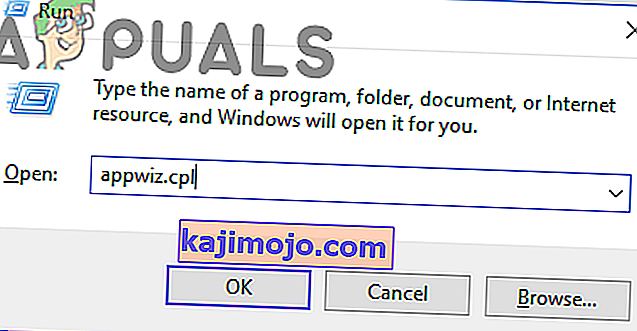
- Press “Windows” + “R” to open the Run prompt.
- Type in “appwiz.cpl” and press “Enter” to open the app management window.
- In the app management window, scroll down and right-click on the “Firefox” application.
- Select “Uninstall” from the list and then follow the on-screen instructions to remove the software from your computer.
- Repeat this step for all instances and bundled applications of the software installed on your computer.
- Make sure to disable any third-party antiviruses at this point to make sure that the software is installed smoothly.
- Head on over to the Mozilla website and click on the download button.

- Click on the downloaded executable and install it on your computer following the on-screen instructions.
- Check to see if doing so has fixed the error message on your computer.


Method 12: Scanning for Malware
It is possible in some cases that the computer has acquired malware that is preventing the user from being able to run all the system functions on their computer. Therefore, in this step, we will be using the default Windows Defender to scan our computer thoroughly for any viruses or malware that might’ve found its way on our computer. For that:
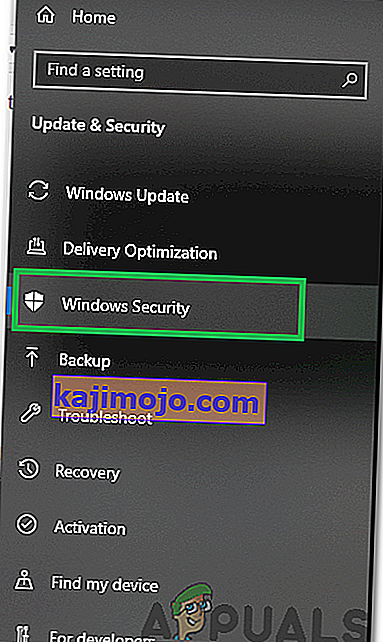
- Press the “Windows” + “I” keys simultaneously on your PC to open the Settings tab.
- Navigate to the Update& Security option and then click on the “Windows Security” button on the left tab.
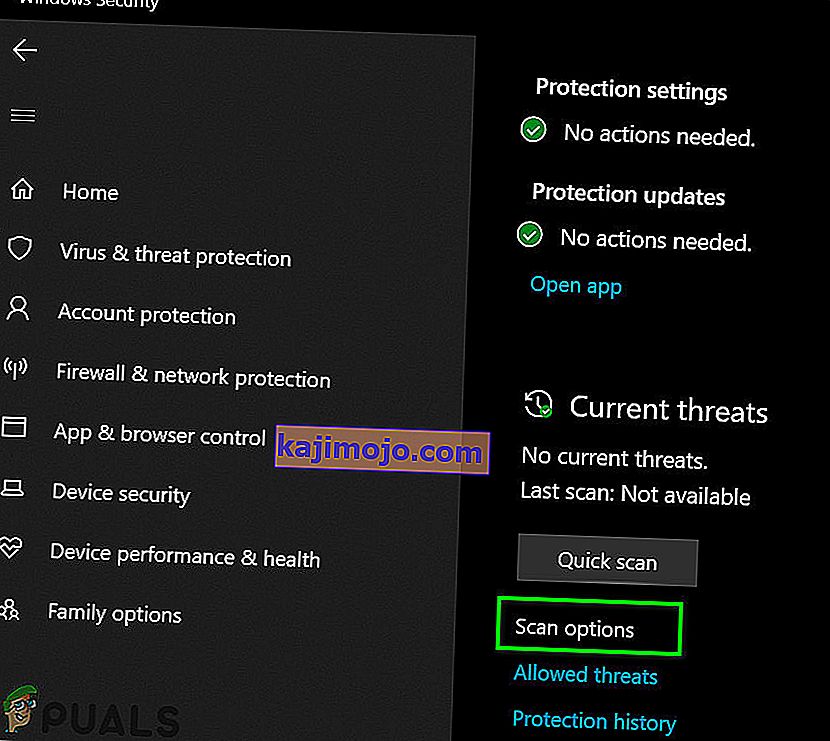
- After that, click on the “Open Windows Security” and select the “Virus and Threat Protection” option.
- After that, click on the “Scan Options” button below the “Quick Scan” window.
- Click on the “Full Scan” option and then hit the button of “Scan Now”.
- Wait for a few seconds while this process gets completed and then finally check if the error gets resolved now.


Microsoft Security Scanner is an additional tool that you can use to test the system for any further viruses and malware because sometimes the default tool isn’t able to perform the scan properly. Therefore, in this step, if the issue still hasn’t been resolved, we will be using the Microsoft Security Scanner to further make sure for any issues.
- Launch your browser and download the Microsoft Security Scanner from here.
- After downloading the executable, run it on your computer and let it install.
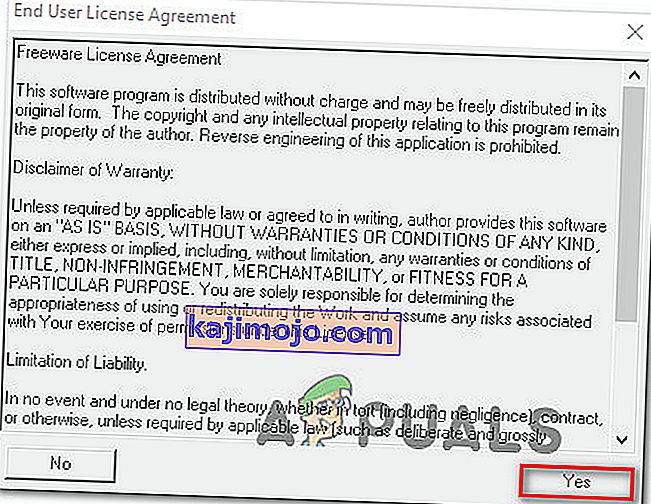
- Accept the License Agreement terms and click on “Next”.
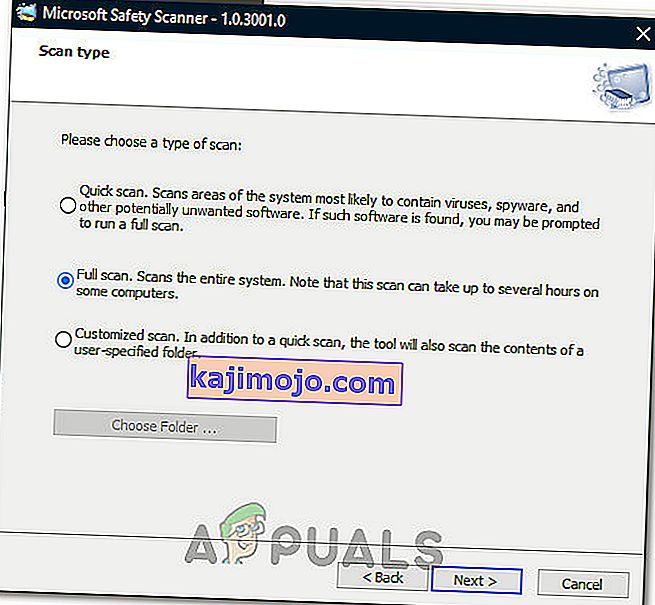
- Select “Full Scan” and click on “Next”.
- After you opt for a full scan, the software will start scanning your entire computer to look for any malware or viruses that might’ve disguised themselves as normal executables or applications.
- After this scan has been finished, check to see if the error message still persists.


Method 13: Install Missing Drivers
It is possible in some situations that your device is missing certain drivers due to which this particular issue is being triggered on your computer. Therefore, we will be checking for any missing drivers and then we will check to see if the error is fixed. In order to do this, follow the guide below.
- Download Driver Easy on your computer.

- Run the downloaded executable and install the software on your computer.
- Run the check and see if there are any missing drivers on your computer.
- Install these missing drivers and then install them either manually or automatically using the Software.
- After installing all the missing drivers, check to see if the issue still persists.

Method 14: Reconfigure Registry
It is possible that in some cases, you haven’t properly configured all the registry settings or that you unknowingly configured something incorrectly. Therefore, in this step, we will be reconfiguring our Registry to fix a certain key that sometimes, if misconfigured, causes this particular error on Windows. In order to do this, follow the guide below.
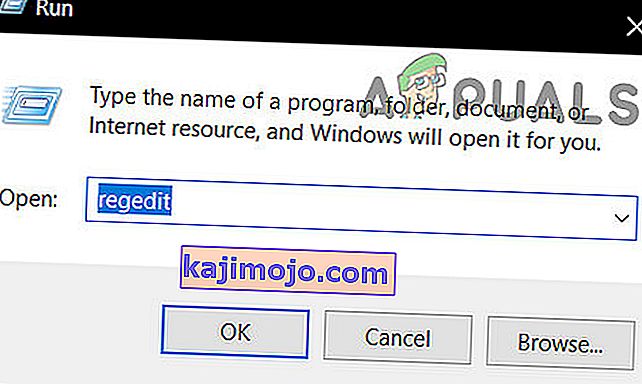
- Press “Windows” + “R” to open the Run prompt.
- Type in “regedit” and press “enter” to launch the registry editor.
- Inside the registry editor, navigate to the following location.
HKLM\SOFTWARE\Microsoft\Windows NT\CurrentVersion\Windows\AppInit_Dlls
- Double click on the “LoadAppInit_DLLs” entry on the right side of the screen.
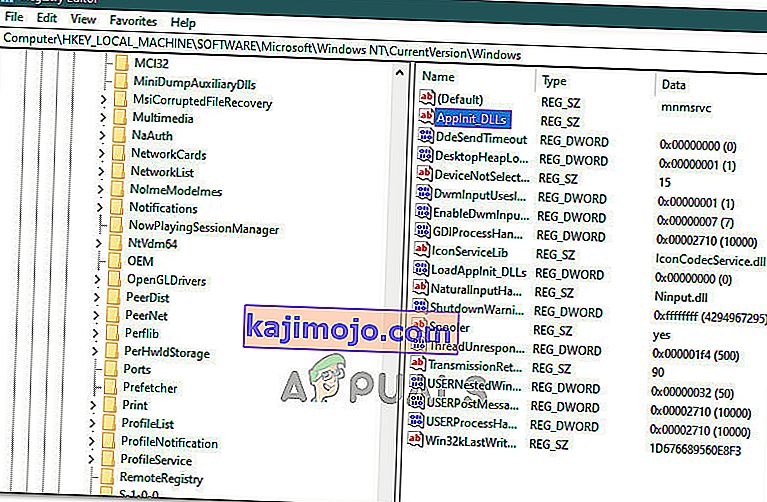
- Change the value of this registry from “1” to “0”.
- Save your changes and exit the registry editor.
- Check to see if doing so has fixed the error.


Method 15: Update Disk Drivers
In some cases, the Disk Drivers that are being used to control your Storage and other Disks installed on the computer might have been outdated due to which the error is being triggered. Therefore, in this step, we will first be opening the Device Management Window and from there, we will be updating these drivers. In order to do so, follow the steps mentioned below.
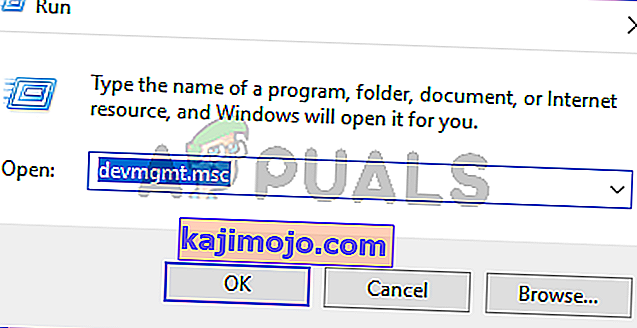
- Press “Windows’ + “R” to open the Run prompt.
- Type in “Devmgmt.msc” and press “Enter” to launch the device management window.
- In the Device Manager, double click on the “DiskDrives” option to expand it.
- Right-click on the storage device listed and select the “Update Driver” option.
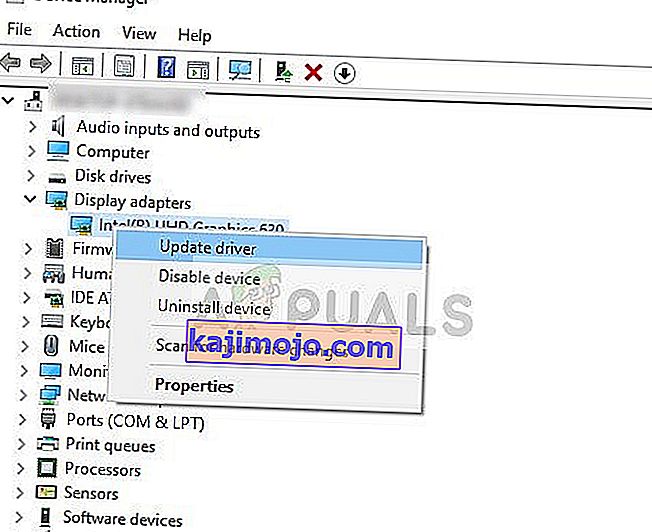
- Select the “Search Automatically for Drivers” option and let the setup search.
- If there are any drivers available, Windows will automatically check for them and install them on your computer.
- Check to see if doing so has fixed the issue.


Method 16: Disabling Automatic Updates and Uninstalling Updates
It is possible in some cases, that this error is stemming from a faulty update install. Microsoft is notorious for pushing out updates that aren’t properly customized to work for all hardware combinations and often go on to break things instead of making them better. Therefore we will make sure that the recent update isn’t installed on our computer.
In order to do this, we will have to first disable automatic updates on our computer and then we will be uninstalling the recently installed updates. Make sure to back up any important data that you don’t want to lose just in case this goes bad.
- Press “Windows” + “R’ to open the Run prompt.
- Type in “service.msc” and press “Enter”.
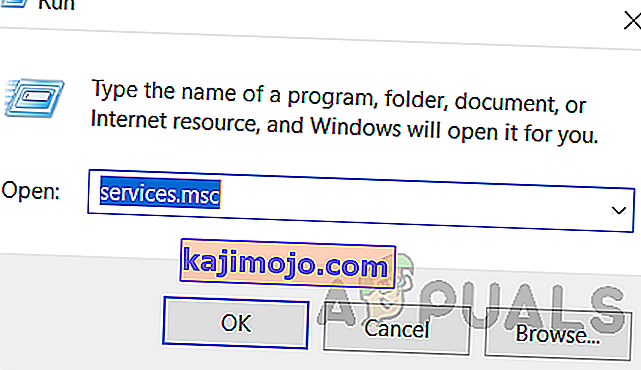
- Scroll through the list and double click on the “Windows Update” service.
- Click on the “Stop” button and then click on the “Startup Type” dropdown.
- Select “Disabled” from the list and select the “Apply” button from the window.
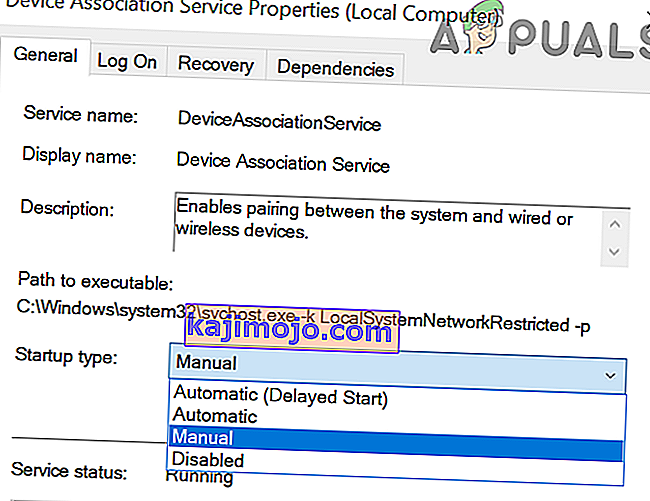
- Click on “OK” to close out of this window.
- Check to see if doing so has stopped your computer from updating.


After stopping the computer from updating, we will now be uninstalling the recent updates that have been installed on your computer. For that:
- Press “Windows” + “I” buttons to open the settings.
- In settings, click on the “Update and Security” option and then select the “Windows Update” button from the left pane.
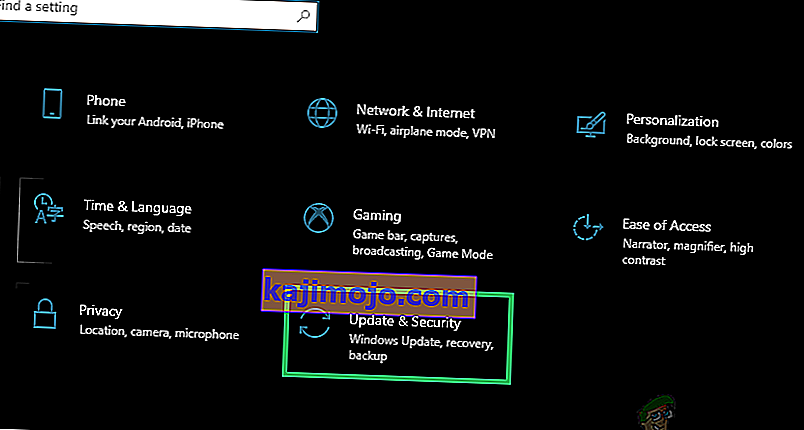
- In the Windows Update, click on the “View Update History” option.
- In the Update History, click on the “Uninstall Updates” option and it should take you to the uninstallation screen where all the recently installed updates will be listed.
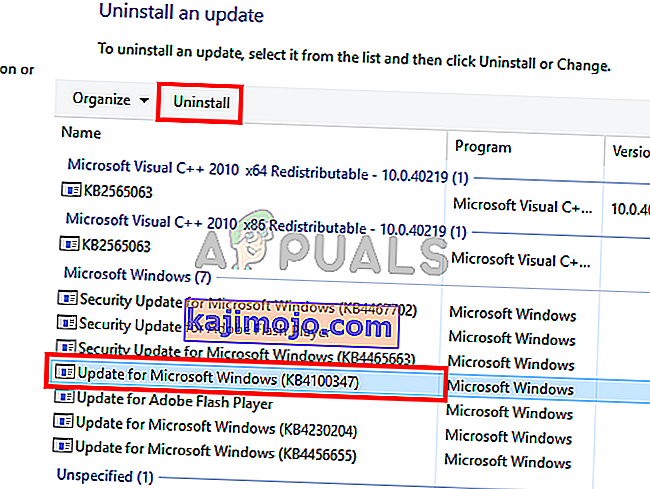
- From the list, right-click on the update that was installed recently and caused this error on your computer.
- Right-click on this update and select the “Uninstall” button to remove it completely from the computer.
- Follow through with the on-screen instructions.
- Check to see if uninstalling has fixed this issue.


Additional Fixes:
- In addition to some of the recommendations given above, you should try to check if there are any bad memory modules (RAM) installed on your computer which can be a cause of this.
- Такође проверите да ли нисте оверцлоцкали РАМ до нивоа који је већи од препорученог ограничења. Ако сте то учинили, покушајте да је вратите на фабричке вредности и проверите да ли је то решило проблем.