Норд ВПН је један од старих играча у ВПН свету и његова Виндовс апликација се сматра једним од најбољих у свету рачунара. Норд ВПН је врло разнолик ако се говори у смислу функционалности и флексибилности. Поред подршке на више платформи, има и различите сервере који се налазе у различитим земљама између којих можете да бирате.

Упркос томе што је апликација на тржишту прилично дуго, корисници пријављују да не могу да се повежу са Норд ВПН-ом. Престаје да се повезује након потенцијалног ажурирања или захтев за ДНС сервере или враћа одговор „истекло време“.
Шта узрокује да се Норд ВПН не повеже?
Будући да ВПН користи целокупну интернет архитектуру рачунарског система, постоји неколико разлога због којих ваш Норд ВПН можда неће бити у могућности да се правилно повеже. Неки од њих су наведени у наставку.
- ИПв6: Очигледно Норд ВПН не подржава протокол ИПв6 ни у једној од својих комуникација. Дакле, ако је ово омогућено, можда нећете моћи да се повежете.
- Програми независних произвођача: Познато је да се програми независних произвођача сукобљавају са софтверским системом и такмиче се за ресурсе; дакле, узрокујући да се не повеже правилно.
- Мрежни адаптер: Будући да Норд користи засебни мрежни адаптер за комуникацију са Интернетом, може бити да мрежни адаптер не ради исправно и да га требате поново покренути.
- Грешка у мрежи: Понекад су мрежне конфигурације на рачунару можда у стању грешке и не узрокују никакву везу. У овом случају можемо покушати да освежимо све променљиве.
Пре него што започнемо са решењима, морате се уверити да ваш интернет заиста ради . Ако ваш Интернет не ради како треба, Норд неће моћи успоставити одговарајућу везу и омогућити вам приступ тунелираној мрежи.
Уверите се да користите приватну мрежу (не школу, посао или јавна места попут болница) и да нису у питању никакви заступници. Након што сте још једном проверили да ли ваш интернет функционише у реду, наставите.
Решење 1: Онемогућавање ИПв6
ИПв6 (Интернет Версион Протоцол 6) је најновија верзија ИП-а у мрежној архитектури рачунара. Подразумевано и даље користимо ИПв4 и још увек нисмо трајно прешли на ИПв6. Међутим, можда има неких од вас који су започели употребу ИПв6 за интернет конекцију. Изгледа да ИПв6 не ради исправно са Норд ВПН-ом. Стога ћемо га онемогућити и поново проверити.
- Кликните десним тастером миша на икону мреже која се налази на траци задатака и изаберите Опен Нетворк анд Интернет Сеттингс . Сада у поставкама кликните на опцију Промени опције адаптера .

- Када уђете у подешавања адаптера, кликните десним тастером миша на адаптер који користите и изаберите Својства .
- Једном у адаптер својствима, искључите је ИПв6 опцију и уверите се да је за ИПв4 омогућен. Сачувајте промене и изађите. Сада поново покрените рачунар и проверите да ли је грешка решена и да ли сте у могућности да се повежете са Норд ВПН.

Решење 2: Провера апликација независних произвођача
Постоје бројне друге апликације и програми који се у свом раду сукобљавају са Норд ВПН-ом. Ако више од једне апликације покушава да приступи ресурсу, постојаће услови трке и они неће радити како се очекује.

Требали бисте покренути управитељ задатака (Виндовс + Р и 'таскмгр') и проверити све апликације које раде у позадини. Једна од таквих апликација за коју се знало да ствара проблеме била је Глассвире Елите . Обавезно га деинсталирајте или онемогућите када покушате да се повежете са Норд ВПН-ом.
Напомена: Такође можете покушати да очистите покретање рачунара. Ово ће онемогућити све спољне независне апликације и покренути само оне потребне. Сада можете покушати да успоставите везу. Ако сте успешни, значи да је нека апликација узроковала проблем. Можете се вратити натраг тако што ћете омогућити сваку апликацију и поново проверити.
Решење 3: Промена локације сервера
Норд ВПН даје корисницима могућност избора да одаберу локацију сервера. Ови сервери су раштркани по целом свету и омогућавају повезивање у складу са њиховим географским положајем, тј. Очекује се да ће сервер који је ближи вама бити бржи. Покушаћемо да променимо локацију сервера који покушавате да повежете и да видимо да ли ово решава проблем неповезивања.
- Покрените Норд ВПН и кликните на наслов Серверс који се налази на врху апликације.

- Сада изаберите други сервер него пре и након избора, покушајте поново да покренете ВПН. Ако имате исто понашање, покушајте да изаберете други сервер и тестирајте мрежу на другој веб локацији.
Решење 4: Поново покрените Нетворк / ТАП адаптер
Норд ВПН креира виртуелни мрежни адаптер на вашем рачунару који може да користи за комуникацију информација. Делује попут моста у којем Норд ВПН модификује поставке тако да може иницирати и одржавати ВПН везу. Понекад ово пређе у стање грешке због чега се не повезујете са својим ВПН сервером. Поново ћемо покренути исправно адаптер који ће осигурати да се све његове конфигурације поново покрену.
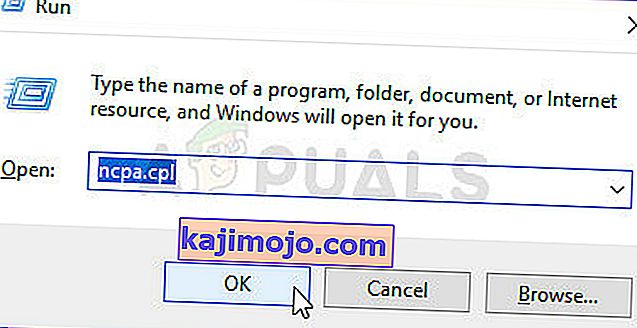
- Притисните Виндовс + Р, откуцајте „ нцпа. цпл “у дијалошком оквиру и притисните Ентер.
- Сви мрежни адаптери биће наведени испред вас. Изаберите ТАП адаптер, кликните десним тастером миша и изаберите Дисабле .

- Након онемогућавања, сачекајте минут. Затим поново кликните десним тастером миша и изаберите Омогући . Покушајте сада да повежете Норд ВПН и видите да ли је ово у питању.
Решење 5: Испирање мрежног стека
Постоји безброј примера када испирање (освежавање) мрежног снопа на рачунару решава различите проблеме повезане са ВПН-ом (укључујући Норд). Овим поступком ћете испразнити ДНС и ИП поставке и уверити се да не постоје неправилна подешавања која могу бити у супротности са апликацијом.
- Притисните Виндовс + С, у дијалошки оквир откуцајте „цомманд промпт“, кликните десним тастером миша на апликацију и изаберите Рун ас администратор .
- Једном у повишеном командном ретку, извршите следеће наредбе једну по једну иза које следи тастер Ентер након сваке наредбе:
ипцонфиг / релеасе ипцонфиг / флусхднс ипцонфиг / ренев нетсх винсоцк ресет нетсх интерфаце ипв4 ресет нетсх интерфаце ипв6 ресет нетсх винсоцк ресет цаталог нетсх инт ипв4 ресет ресет.лог нетсх инт ипв6 ресет ресет.лог

- Now close the command prompt and try launching Nord VPN again. Check if you can connect with it properly.
Solution 6: Reinstalling Nord VPN (along with the TAP adapter)
If all the above methods don’t work, you need to make sure that your Nord installation is proper and there is nothing wrong with the installation files. The TAP adapter will also be reinstalled in the process because Nord VPN manages the adapter and it is only for its use. Make sure that you are logged in as an administrator. If reinstalling doesn’t work, make sure that your credentials are correct which you are entering the services have not expired.
- Press Windows + R, type “appwiz.cpl” in the dialogue box and press Enter.
- Once in the application manager, search for the entry Nord VPN from the list, right-click on it and select Uninstall.

- Now restart your computer and download the application again from Nord VPN’s official website. Now after entering your credentials, try connecting again and check if you can establish the VPN connection correctly.
Solution 7: Using an Alternative VPN Service
There are numerous VPN clients out there in the Windows market. However, we recommend or readers to try CyberGhost. This VPN service is as simple as it gets and also provides you with servers located at different countries. It even has separate VPN servers for streaming Netflix and BBC with ease. Follow the steps below to download the application and get your connection secure in no time.
- Download CyberGhost from (here).

- After downloading the VPN, install it on your computer. You might be asked for proper permissions. Make sure that you are logged in as an administrator and press Yes to all the permissions asked.
- After CyberGhost is installed on your computer, launch it. Here you will see a list of different servers available along with the distance from your actual location (more distance means slower internet).

- After selecting the server, click on the power button present at the right-hand side of the application. You can also select dedicated servers for torrenting and streaming (present at the left navigation pane).
Solution 8: Disable Firewall
In some cases, the default Windows Firewall might be preventing the application from working properly. Therefore, in this step, we will first be allowing it through the Firewall and make sure that it isn’t blocked by the Firewall and then we will also make sure that Windows Defender has it added as an exception. For that:
- Press “Windows” + “R” to launch the Run prompt.
- Type in “ControlPanel” and press “Enter” to launch the classical control panel interface.

- Click on the “View by:” button, select “Large Icons” and then click on the Windows Defender Firewall option.
- Select the “Allow an app orfeature through the Firewall” button on the left pane and then click on the “Change Settings” button and accept the prompt.
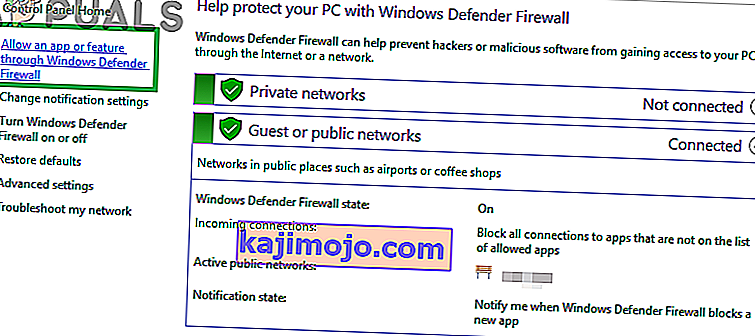
- From here, make sure that you check both the “Public” and the “Private” options for Nord VPN and its related applications/drivers.
- Save your changes and exit out of the window.
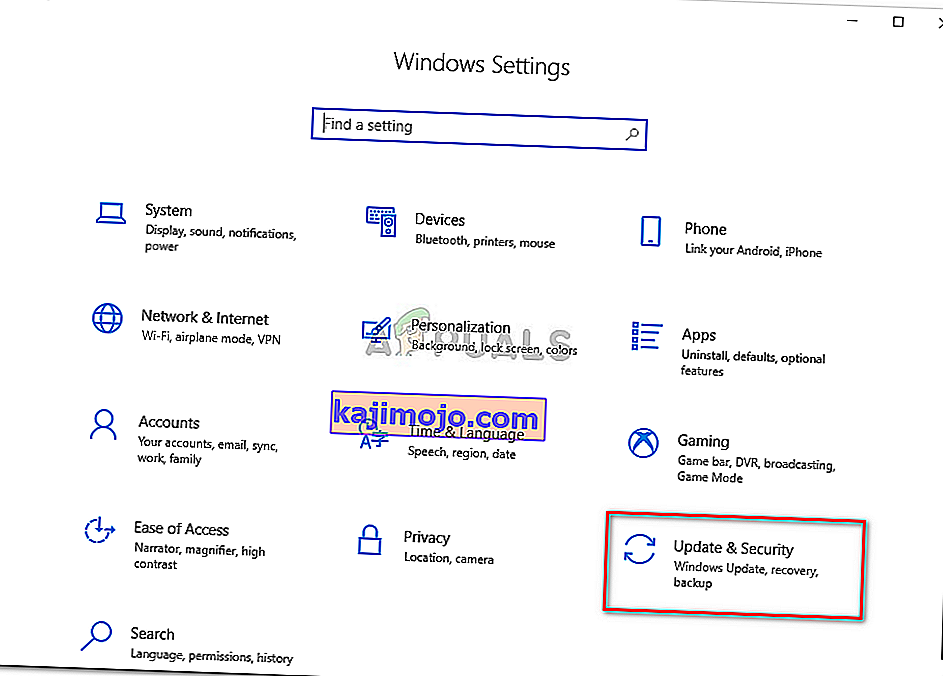
- After that, press “Windows” + “I” to launch the settings and click on the “Updateand Security” option.
- From the left pane, click on the “Windows Security” button and then click on the “Virus and Threat Protection” button.
- Select the “Manage Settings” button under the Virus and Threat Protection Settings heading.
- Scroll down and click on the “Add or Remove Exclusions” button in the next window.
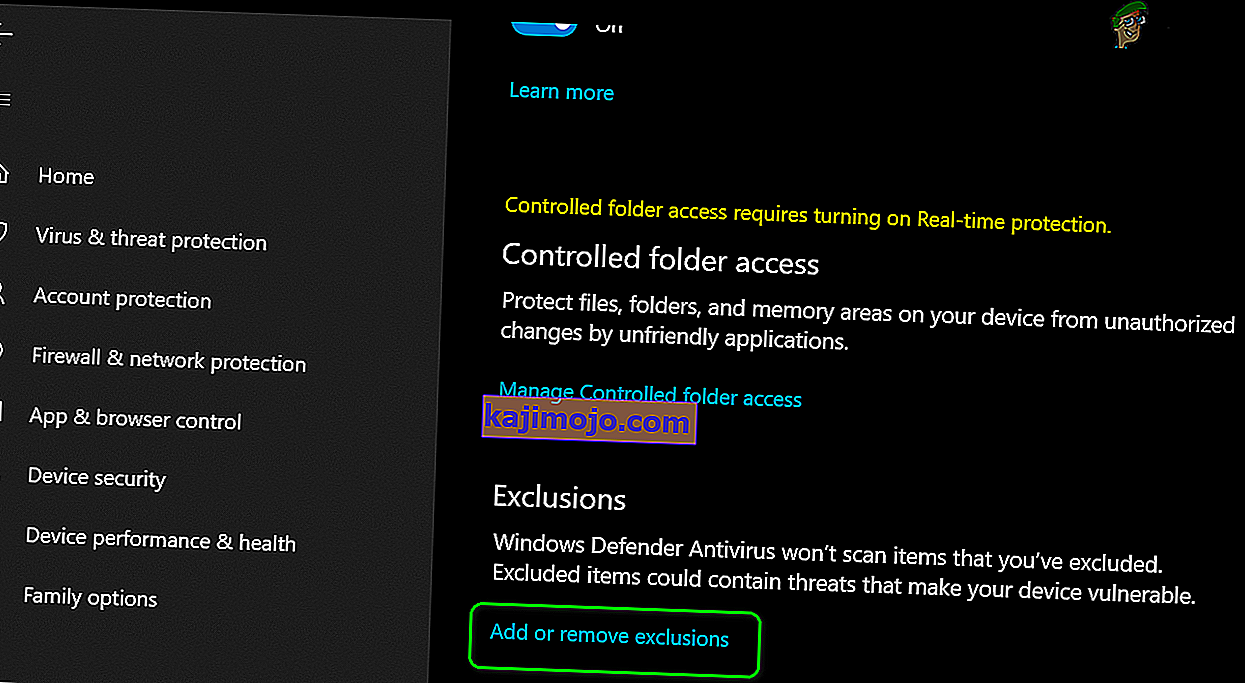
- Click on the “Add an Exclusion” option and select “Folder’ from the File type.
- Make sure to specify the Nord VPN folder and exit out of this window after saving your changes
- Check and see if doing so has fixed the issue with Nord VPN not connecting.


Solution 9: Change NordVPN Protocol
It is possible that Nord VPN might be running into issues while trying to connect to its servers due to the protocol configuration in its settings. If one type of protocol isn’t working for you, it is always recommended to try and switch to the other protocol to make sure that the issue isn’t tied to the wrong selection of the protocol type automatically or manually. For that:
- Launch NordVPN and make sure to disconnect from any currently active sessions.
- Click on the “Gear” icon on the top right corner and go into the settings.
- Click on the “Advanced” option from the left-hand side menu.
- Click on the “Protocol” dropdown and check on “TCP”.
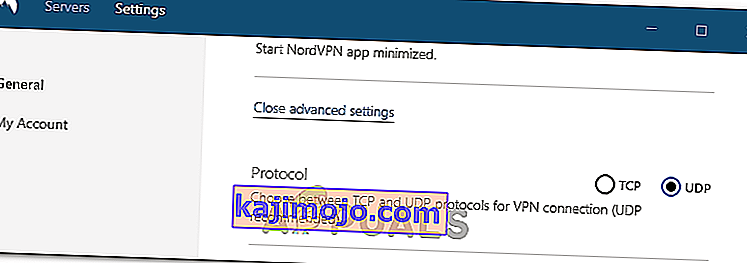
- This should change your protocol from TCP to UDP.
- Check to see if doing so fixes the issue for your computer.
- To Verify that none of the protocols work, make sure to repeat the steps and select “UDP” instead of TCP and then check again.
- If none of the selected protocols are able to make a connection with the server, move on to the other fixes.

Solution 10: Changing DNS Server Configuration
DNS Servers are used by the computer to establish a stable and secure internet connection with other sites on the internet, however, if the computer is unable to detect the DNS settings properly, or if the selected DNS server is facing outage, Nord VPN might not connect properly. Therefore, in this step, we will be changing the DNS configuration to ensure that DNS isn’t an issue. For that:
- Press “Windows” + “R” to launch the Run prompt.
- Type in “ncpa.cpl” and press “Enter” on the keyboard to launch the network configuration panel.
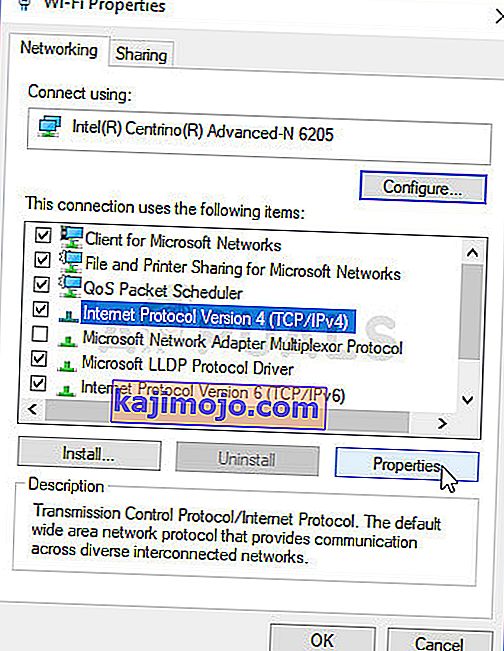
- Right-click on your internet connection and select the “Properties” option.
- Double click on the “Internet Protocol Version4 (TCP/IPV4)” option and check on the “Use the following DNS addresses” button.
- At first, type in “8.8.8.8” and “8.8.4.4” in the primary and the secondary DNS addresses field respectively and click on “OK”. After that, check to see if NordVPN is connecting, if it isn’t, try to use “103.86.96.100” and “103.86.99.100” in the primary and the secondary fields respectively.
- Check to see if you are able to make a connection by selecting those DNS servers.


Solution 11: Opening Ports
For some people, the issue might arise if the ports that NordVPN uses to communicate with its servers are being blocked by your router. For security reasons most routers often block ports used by VPN/Network Tools to prevent any alterations to your connections and if that is the case, we will have to open the ports by logging in to the router’s control panel. For that:
- Press “Windows” + “R” to launch the Run prompt and type in “cmd” and then press “Ctrl” + “Shift’ + “Enter” keys on your keyboard to provide admin permissions.

- Type in the following command in the command prompt to list the IP information.
ipconfig /all
- The computer will list all the information of the network adapters connected to your computer.
- Under the default gateway option, after the mac address, there should be an IP address that should look something like “192.168.x.x”.
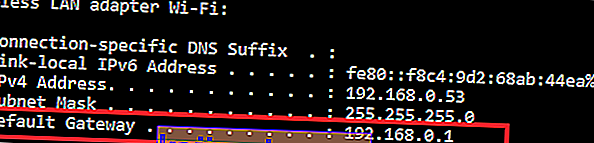
- Copy this IP address and launch your browser.
- Paste the IP address within a new tab on the browser and press “Enter” to navigate to the browser’s login page.
- Once on the login page, log into the control panel with your credentials, both of which, i.e the username and password should be written on the back of your internet router. If not, then the username should be admin and the password should be the Wifi password that you use to connect your devices.
- After logging into the Control panel, look around for a “NAT” or “Port” option that allows you to forward ports.
- Type in “500” and select “UDP” from the list.
- Click on “Save” to forward the 500 UDP port and exit out of the control panel after the change has been made.
- Try connecting with Nord VPN and check to see if the issue persists.


Solution 12: Use Hotspot
Mostly, this error can be fixed simply by employing your mobile’s hotspot connection instead of the Wifi or the Wired connection that you are already using on your computer. This does seem an inconvenience for Data conscious people but it seems to be the only way some people are able to connect through Nord VPN as some routers block it completely.
Note: In addition to this, you can try to change the firmware on your router to avoid any permanent blocks put from the router or to eliminate any bugs with the connection.