Раинбов Сик Сиеге је сјајна тактичка пуцачина за више играча коју је развио и објавио Убисофт. Фокус на уништавање животне средине и сарадња између чланова тима лансирао га је до успеха, али многи корисници нису успели да уживају у тактичкој предности коришћења гласовног ћаскања, јер то једноставно не функционише у игри.

Много је различитих метода које су играчи користили за решавање проблема током година, а ми смо одлучили да прикупимо најкорисније и пружимо детаљна упутства. Пажљиво их пратите у наставку и проблем би требало да нестане зачас!
Шта узрокује да гласовни цхат не ради у Раинбов Сик Опсади?
Овај проблем има прилично дугачку листу могућих узрока који му се могу приписати. Препоручујемо вам да проверите узроке да бисте идентификовали свој сценарио и можда решили проблем брже него обично. Погледајте комплетну листу испод!
- Нема подразумеваног уређаја за снимање - На рачунару треба да буде изабран један уређај за снимање као подразумевани. Ово ће сигнализирати игру којем уређају треба приступити и проблем би требао престати да се појављује.
- Проблеми са антивирусима - Неки антивирусни алати могу да спрече игру да приступи вашем хардверу и можда ћете га морати додати на листу изузетака да бисте решили проблем.
- Звучни управљачки програми - Тренутно инсталирани звучни управљачки програми можда су престари или оштећени. То може проузроковати све врсте проблема са звуком и топло препоручујемо да их ажурирате што је пре могуће.
- Асус Сониц Студио - Ово је програм за који је пријављено да не функционише добро заједно са поставкама гласовног ћаскања у игри, па вам препоручујемо да га једноставно деинсталирате ако не зависите од њега.
- ДНС адреса - Ово може изгледати чудно, али промена великог броја ДНС адреса које ваш рачунар користи успела је да реши проблем многим корисницима!
Решење 1: Изаберите подразумевани уређај за снимање
Многи корисници су пријавили да је проблем настао чињеницом да ниједан уређај није изабран као подразумевани уређај за снимање. То можете прилично лако решити и то је оно што ову методу чини тако корисном. Требаће вам само минут и има велику шансу да у тренутку решите ваш проблем. Следите кораке у наставку да бисте изабрали подразумевани уређај за снимање!
- Кликните десним тастером миша на икону звучника у доњем десном делу екрана. Налази се на системској палети у десном делу траке задатака. Изаберите Соундс из контекстног менија који ће се појавити.

- Можете и да користите комбинацију тастера Вин + Р да бисте отворили дијалошки оквир Покрени . Унутар оквира откуцајте „ цонтрол “ и кликните дугме ОК да бисте отворили контролну таблу . Још лакше, можете једноставно потражити Цонтрол Панел са отвореним менијем Старт.
- Кад уђете у контролну таблу, промените опцију Поглед по на Велике или Мале иконе у горњем десном делу екрана. Померите се надоле док унутра не дођете до опције Звукови . Кликните левим тастером миша да бисте га отворили.

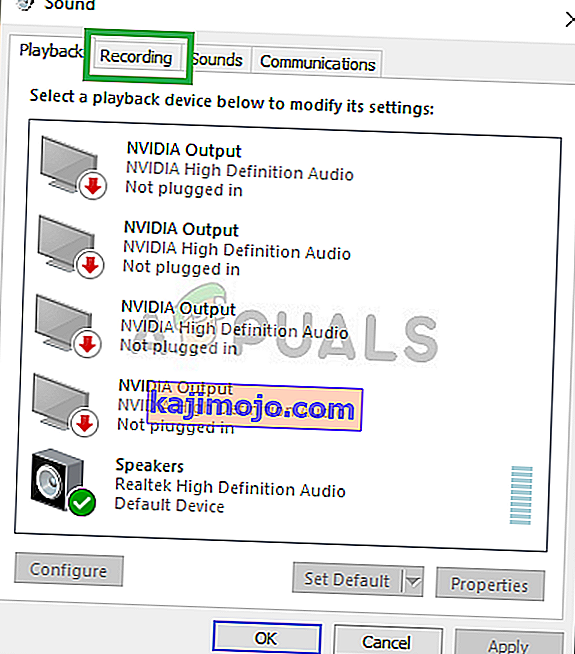
- У сваком случају, идите на картицу Снимање у прозору Звук и потражите свој главни уређај за снимање. Требало би да има зелену квачицу у доњем десном делу иконе. Кликните левим тастером миша да бисте је изабрали и кликните на дугме Постави подразумевано испод. Кликните на ОК да бисте потврдили промене и проверите да ли гласовно ћаскање почиње да ради у Раинбов Сик Сиеге!
Решење 2: Додајте Раинбов Сик Сиеге као изузетак у свој антивирус
Корисници су пријавили да имају проблема са антивирусима у вези са игром. Наравно, игра није злонамерна, али то је нешто прилично тешко доказати безбедносном софтверу. Међутим, деинсталација би требала бити крајње средство. Пре тога, можете да додате изузетак за извршну датотеку игре или директоријум и ваш антивирус би то требало да дозволи сваки пут када се покрене. Следите кораке у наставку и проверите да ли је то успело да реши ваш проблем!
- Отворите антивирусни клијент двоструким кликом на његову икону доступну у системској палети (десни део траке задатака на дну прозора) или потрагом у менију Старт или након отварања Сеарцх / Цортана.
- Опција Изузеци или Изузимања налази се на различитим местима када су у питању различити антивирусни алати. Често га је лако пронаћи без пуно муке, али ево неколико брзих корака како да га пронађете у најпопуларнијим независним антивирусним алатима:
Касперски Интернет Сецурити : Почетна страница >> Подешавања >> Додатне >> Претње и изузимања >> Изузимања >> Наведите поуздане апликације >> Додај.

АВГ : Почетна >> Подешавања >> Компоненте >> Веб штит >> Изузеци.

Аваст : Почетна >> Подешавања >> Опште >> Изузимања.

- Мораћете да додате извршну датотеку или фасциклу Раинбов Сик Сиеге у оквир који ће се појавити тражећи од вас да пређете на игру. Извршна датотека треба да се налази у истој фасцикли у којој сте одлучили да инсталирате игру. Подразумевано је:
Ц: \ Програм Филес (к86) \ Стеам \ стеамаппс \ цоммон
- Проверите да ли сте сада у могућности да играте игру и правилно користите гласовно ћаскање. Ако и даље неће успети, покушајте поново да покренете рачунар и покушајте поново. Последњи корак био би деинсталирање антивируса и испробавање другог ако се проблем и даље појављује.
Решење 3: Поново инсталирајте аудио управљачке програме и ажурирајте их на најновију верзију
Такве проблеме са микрофоном прилично често узрокују управљачки програми за аудио уређаје и размислите о њиховом ажурирању, посебно ако то већ неко време нисте радили. На овај начин можете да деинсталирате тренутне управљачке програме који можда узрокују овај проблем и инсталирате нове, нове управљачке програме који можда неће довести до појаве ове грешке. Обавезно следите кораке у наставку!
- Пре свега, мораћете да отворите Девице Манагер . Додирните тастере Виндовс и Р истовремено и откуцајте „ девмгмт. мсц “у пољу које ће се појавити за отварање Управљача уређајима.
- Можете и да потражите Управљач уређајима тако што ћете кликнути на дугме менија Старт у доњем левом делу екрана, на тастер Виндовс или на Сеарцх / Цортана Једноставно укуцајте „ Управитељ уређаја “ и кликните левим тастером миша на први резултат.

- Након тога проширите одељак Контролори звука, видеа и игара , кликните десним тастером миша на главни аудио уређај и у контекстном менију који ће се појавити одаберите опцију Деинсталирај уређај . Такође, обавезно потврдите све упите у којима се тражи да потврдите свој избор.

- You can now visit your manufacturer’s website and look for drivers manually. Enter the required data about your computer and your operating system, and download the latest driver. Run the installer on your computer, follow the instructions on-screen, and that’s it.
- Alternatively, you can simply click the Action option at the menu bar at the top of the window and choose the Scan for hardware changes option inside. It will find that you have uninstalled a driver and the latest one found by Windows will be installed automatically.

- Reopen Rainbow Six Siege and check to see if voice chat has started working!
Solution 4: Update Windows to the Latest Version
There are pros and cons when it comes to Windows Update. It often breaks as many things as it’s able to fix. In this particle scenario, Windows Update is seen as a savior as many users were able to resolve the problem simply by downloading and installing the latest updates to Windows 10. Make sure you follow the steps below to do the same and, hopefully, resolve the problem.
- Open Settings by clicking the Start menu button and click the cog icon in the bottom left corner. Alternatively, you can simply search for Settings in the Start menu or use the Windows Key + I key combination.

- Inside the Settings app, click to open the Update & Security Make sure you stay in the Windows Update tab. If no updates are being displayed inside, click the Check for updates button to look for more.
- If there are updates ready to be installed or if the search from Step 2 find a new version of Windows to update to, its description should be available below, along with the Download and install now

- Click this button and wait for windows to finish downloading and installing the update. You will probably need to restart your computer to complete the download. Check to see if the problem is resolved afterward!
Solution 5: Uninstall Asus Sonic Studio
If you are an Asus user and if you have this program installed on your computer, you should consider uninstalling it. It’s an audio manager for Asus devices and many users have reported voice chat problems with Rainbow Six Siege with this program installed. Follow the instructions below to uninstall it completely!
Windows 10:
- Open Settings by clicking the Start menu button and click the cog icon in the bottom left corner. Alternatively, you can simply search for Settings in the Start menu or use the Windows Key + I key combination.

- Once inside, click to open the Apps section which should immediately list all programs you have installed on your computer. Locate the Asus Sonic Studio entry in the list, left-click its entry once, and select the Uninstall button which will appear.
- Follow the instructions which will appear on the screen in order to complete the uninstallation wizard.
Other versions of Windows:
- On other Windows versions, you can use the Win Key + R key combination to open the Run dialog box. Inside the box, type “control.exe” and click the OK button to open the Control Panel. Even more easily, you can simply search for Control Panel with the Start menu open.

- Once inside Control Panel, change the View by option to Category at the top right part of your screen. Click the Uninstall a program button under the Programs section in Control Panel.

- Locate Asus Sonic Studio in the list of installed programs on your computer, left-click to select it, and click the Uninstall button from the menu above. You can also right-click its entry and choose Uninstall from the context menu which will appear.
- Once again, follow the instructions on-screen to uninstall it and check to see if voice chat has started working while playing Rainbow Six Siege.
Solution 6: Edit the Configuration File
If you are unable to resolve the problem in-game or by any of the methods we have presented above, there is an easy way to attempt a solution by simply editing a configuration file located in your Documents folder. This should reset the voice chat capture mode and you should be good to go. Make sure you follow the instructions below carefully!
- Make sure the game is closed before proceeding! Locate the This PC entry on your Desktop and double-click to open it. Alternatively, you can simply open a folder on your computer and left-click This PC from the navigation menu at the left side of the folder window.

- Anyway, under the Devices and drives section inside This PC, make sure you double click your Local Disk (C:) Navigate to Users >> YourUserName >> Documents >> My Games >> Rainbow Six – Siege.
- Once inside the Rainbow Six – Siege folder, make sure you open the folder named like your UplayID. It might be a seemingly random string of letters and numbers if you haven’t set up your ID properly. Open this folder.

- Inside this folder, right-click the GameSettings configuration file and choose to open it with a text editor such as Notepad. Other text editors are okay as well.
- After opening it, use the Ctrl + F key combination to open the Find You can also click Edit from the menu bar at the top of the window and choose Find from the menu which will appear.

- In the Find what text box, make sure you type “VoiceChatCaptureMode”. Change the number next to this option to 1. Use the Ctrl + S key combination to save the changes or click File >> Save. Reopen the game and check to see if the same problem still appears!
Solution 7: Decrease the Voice Chat Record Threshold
This is a simple in-game setting which was driving players mad for a long time. Basically, if the threshold is set too high, you won’t be able to use voice chat properly. All you need to do to resolve the problem is to decrease the voice chat record threshold by following the steps we have prepared below.
- Open the game by double-clicking its icon on the Desktop. If it’s installed via Steam, open your Steam client from the Desktop or by searching for it in the Start menu or the Search/Cortana window and left-click the first result which will appear.

- Once the Steam client opens, click the Library button from the top of the window, right-click the Rainbow Six Siege entry in the list of games you have installed, and choose Play Game from the context menu which appears.
- Once the game’s home screen appears, click the cogs icon at the top right part of the screen and choose Options from the dropdown menu.

- Navigate to the Audio tab inside the options section and look for the Voice Chat Record Threshold Make sure you decrease it from its high value to something around 20. Click the Apply button below and check to see if voice chat has started working properly!
Solution 8: Use Cloudflare’s DNS Address
Changing the default DNS address your computer uses to connect to the Internet with the free one provided by Cloudflare can resolve the voice chat issue with the game. Many users have benefitted from this method and you can easily be one of them if you follow the instructions below!
- Use the Windows Key + R key combination to open the Run dialog box. Type “ncpa.cpl” inside the bow without the quotation marks and click OK.

- Alternatively, you can search for Control Panel in the Start menu and left-click the first result. Change the View by option inside Control Panel to Category and click the Network and Internet section to open it.
- Once inside, click to open the Network and Sharing Center. From the left-side menu, choose the Change adapter settings

- Anyway, right-click the network adapter you use to connect to the Internet and choose Properties from the context menu which will appear.
- Locate the Internet Protocol Version 4 (TCP/IPv4) entry in the “This connection uses the following items” list, left-click to select it, and click the Properties button below.

- Change the second radio button to Use the following DNS server addresses. Set the Preferred DNS server to 1.1.1.1 and the Alternate DNS server to 1.0.0.1 and check the Validate settings upon exit box.

- Apply the changes you have made by clicking the OK button and check to see if voice chat has started working properly!
Solution 9: Enabling Stereo Mix
In some cases, the stereo mix feature from the recording panel might be disabled due to which this error is being encountered. Therefore, in this step, first, we will enable the stereo mix and then change the recording quality of the microphone to work more smoothly with the game. For that:
- Navigate to your desktop and right-click on the “Speaker” icon on the bottom right of the system tray.
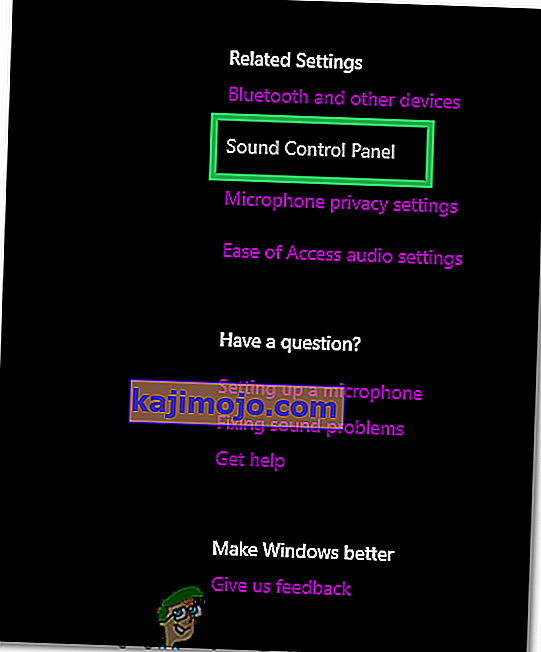
- Select “Open Sound Settings” and then click on the “Sound Control Panel” button.
- Once in the sound control panel, click on the “Recording Tab” and in this tab, right-click on the “Stereo Mix” option and select “Enable”.
- Now right-click on your microphone in the recording tab and select “Properties”.
- Go to “Advanced’ and click on the “Quality” dropdown.
- From here, select the very first option in the list and then start the game. Start going downwards across the list one by one until you find one that fixes the error.
- Check to see if the issue persists.


Solution 10: Configuring Microphone Privacy
In some cases, the Microphone privacy settings might be preventing it from working during the gameplay. Therefore, in this step, we will be changing some WIndows’ Privacy settings in order to allow the recording of your voice. For that:
- Press “Windows” + “I” to open the settings.
- Click on “Privacy” and then select “Microphone” from the left pane.
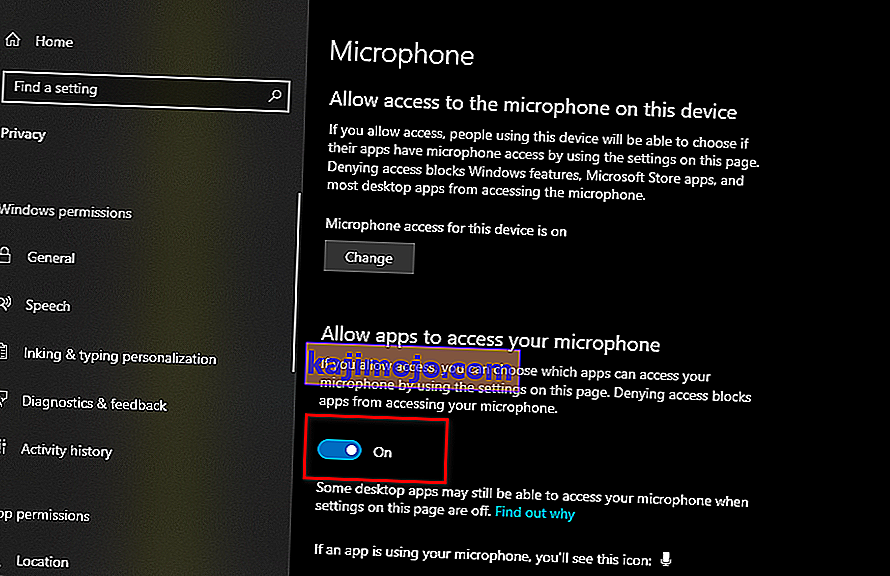
- Click on the “Allows Apps to Access Microphone” toggle and then scroll down to allow apps to access your microphone.
- Turn ON the toggle in front of individual apps as well which you intend to use for VOIP.
- Check to see if the issue persists.

If the issue still persists and you are all that determined to get it fixed, the only workaround left is to perform a reinstall of Windows and check if that fixes your issue.