Counter-Strike (CS) is a series of multiplayer games where there are two teams i.e. Terrorists and Counter-Terrorists who battle for dominance in several maps and layouts. There are a number of different modes of playing the game and the game itself is ranked one of the most popular first-shooter multiplayer games ever developed.
Despite its popularity, we received reports from several users that they were not able to use their microphone when communicating with people on their team. Communication is one of the core elements of CS: GO and if it stops working, your gameplay will be ruined. In this article, we will go through all the reasons as to why this error occurs and also the workarounds which you can perform to remedy it.
What causes the Mic in CS: GO not to Work?
After receiving multiple user reports and replicating the problem on our own computers, we came to the conclusion that the issue occurred due to several different reasons. Some of the reasons why you might not be able to use the Mic in CS: GO are but not limited to:
- Restriction in Settings: After a Windows Update, all the applications which were initially granted access to the microphone had their permissions removed. Here, you have to manually navigate to the settings and grant permission.
- Bad drivers: It is possible that the drivers installed on your computer against your Microphone device are either outdated or corrupt. Here, reinstalling the drivers will help.
- Incorrect in-game settings: CS: GO has its in-game settings present inside the game which control the input of the microphone and the threshold volume etc. If these settings are not set correctly, you might be experiencing several issues.
- Physically damaged microphone: Another instance where you might experience the problem is where your microphone is physically damaged and not transmitting the volume itself. This is a very common case and troubleshooting correctly helps diagnose.
Before you start with the solutions, make sure that you are logged in as an administrator on your computer and have an active internet connection as it might be required to update the drivers.
Solution 1: Enabling the Microphone
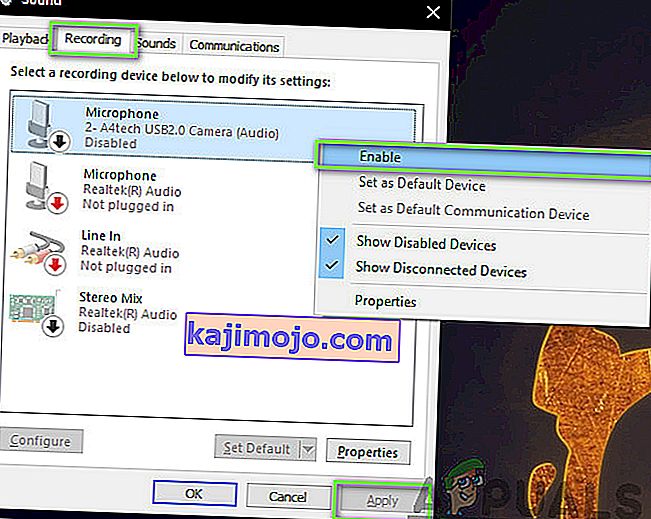
Before we start with other technical solutions, it is worth checking whether you have your microphone enabled or not. Usually, in some cases, the microphone was disabled by default and users didn’t notice this anomaly. In this solution, we will navigate to the control panel and then after opening the sound settings, make sure that the microphone is enabled.
- Press Windows + R, type “control” in the dialogue box and press Enter.
- Once in the control panel, click on click on View by > Large icons and select Sound and go to the Recording tab.

- Right-click anywhere on the empty space and make sure that the option Show disabled devices and Show disconnected devices is shown.
- If the headphones/microphone appear on the window, right-click on them and select Enable. Now check if you can hear the mic properly.
Note: You should also try setting the microphone as the default device. This will help solve any conflicts it has with other potential microphones on your computer.
Solution 2: Checking Mic Threshold Levels
Like all other operating systems, Windows also has control on the amount of threshold level your mic is inputting into your system. This is present against the properties of your device which are present in the sound settings. If the threshold volume of your microphone is low, the voice may be transmitting but on a very low level which will not be hearable. Here, we will navigate to the settings and change the mic levels manually.
- Navigate back to the sound settings as we did earlier on, right-click on your device and select Properties.
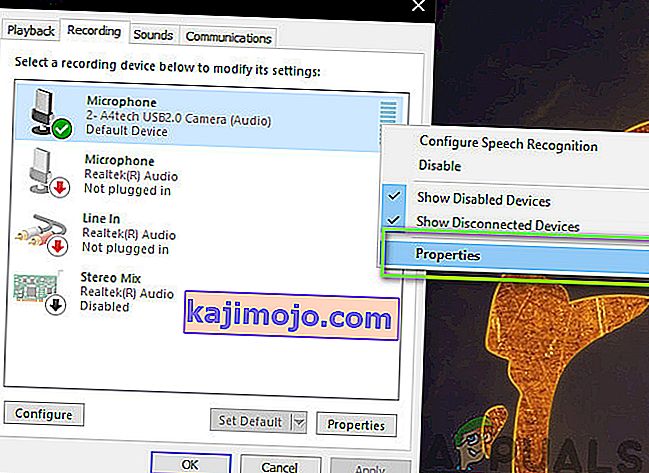
- Once in Properties click on Levels tab, make sure that the mic levels are set to maximum. Also, make sure it isn’t muted.
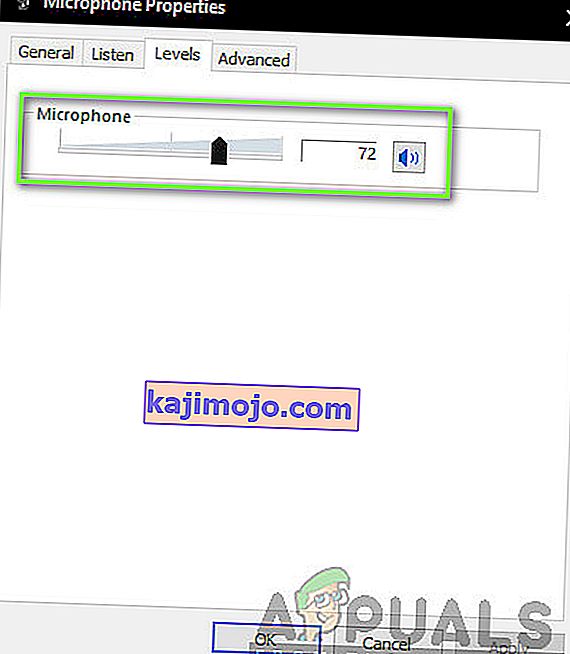
- Once the changes are made, press Apply to save changes and exit. Now check if the problem is solved.


Solution 3: Granting Permission to CS: GO in Settings
Another scenario of your Microphone not working in CS: GO is where it is not granted permission at all. After a Windows Update, a new feature was introduced which allowed users to limit access of applications to your microphone for privacy purposes. In this solution, we will navigate to the privacy settings and then grant the permission manually to all Desktop applications.
- Press Windows + S, type “settings” in the dialogue box and press Enter.
- Once in the settings, click on Privacy and then click on Microphone using the left navigation bar.
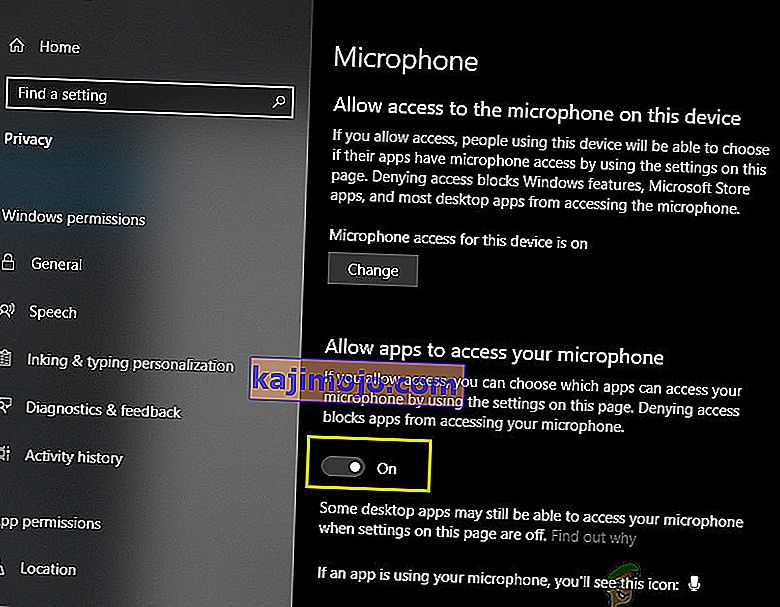
- Now, make sure that the following options are Turned on:

Allow Desktop apps to access your microphone Allow access to the microphone on this device Allow apps to access your microphone
- After you have made sure that these options are turned on, save changes and exit. Now try launching CS: GO and check if the microphone issue is fixed.
Solution 4: Changing CS: GO internal Settings
Another thing to try before we move on to installing the drivers etc. is checking whether the Mic settings in CS: GO itself are set correct. Here, we will navigate to the CS: GO settings in-game and then try tweaking to see if any favors our situation.
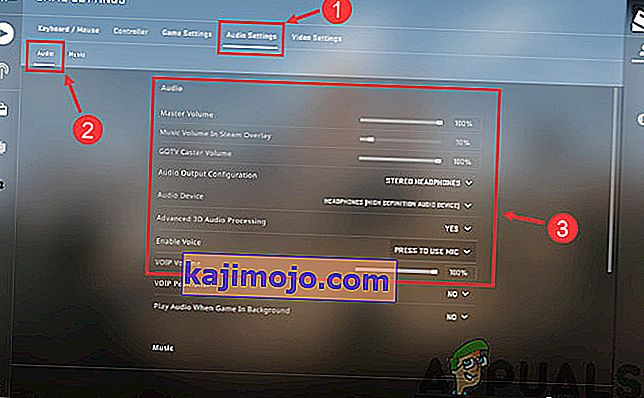
- Launch CS: GO on your computer and click on the gear icon present on the left pane.
- Now, click on the Audio Settings tab and click Audio. Now, go through the Audio settings and make sure they are all turned on to work perfectly.
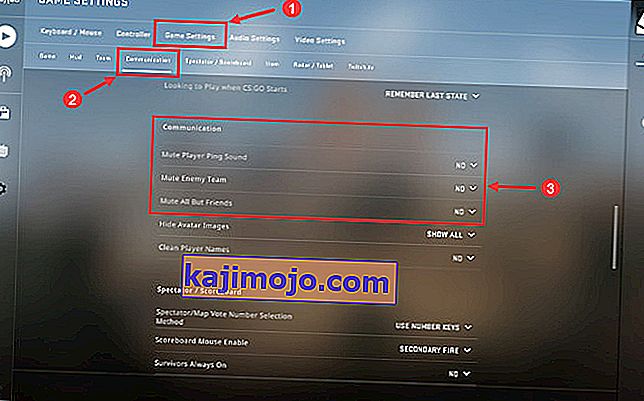
- Another scenario can be where you have accidentally muted your friends. Navigate to Game Settings > Communication. Now check if there are any muted users.
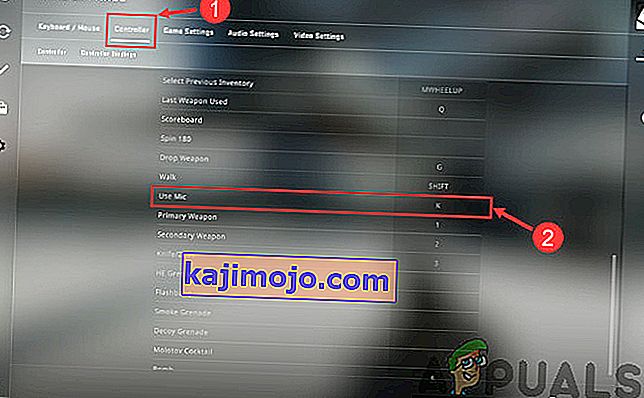
- Now, go to the Controller and here you should assign a shortcut key to it (key-binding) so you can access the microphone when playing. If there is already one assigned, you are good to go.
- Exit the settings, Now relaunch CS: GO and check if the issue is resolved.


Solution 5: Checking for Hardware Damage
If all the above methods don’t work, there might be a possibility that there is hardware damage of your microphone set. Usually, people ignore this scenario and keep on troubleshooting. If your microphone component is broken physically, there is no way we can make it work using any troubleshooting methods.
The way to check whether your microphone is physically damaged or not is plugging it to another computer. When you plug it to another computer, you should try using it the microphone in some dummy program such as Skype Test Audio module and see if the sound gets transmitted properly. If it does, it means there is some issue with your computer.
Solution 6: Reinstalling the Microphone Drivers
If all the above methods don’t work, you should check whether the drivers installed on your computer are not broken and are updated to the latest version. If the drivers are bad, there will be no communication between the device and the operating system and you will not be able to use your microphone. Now there are two ways through which you can update your Microphone drivers; either you can update them manually or automatically. Both methods will be listed below:
- Press Windows + R, type “devmgmt.msc” in the dialogue box and press Enter.
- Once in the device manager, navigate to the category “Sound, video and game controllers”. Locate your Microphone device, right-click on it and select “properties”.
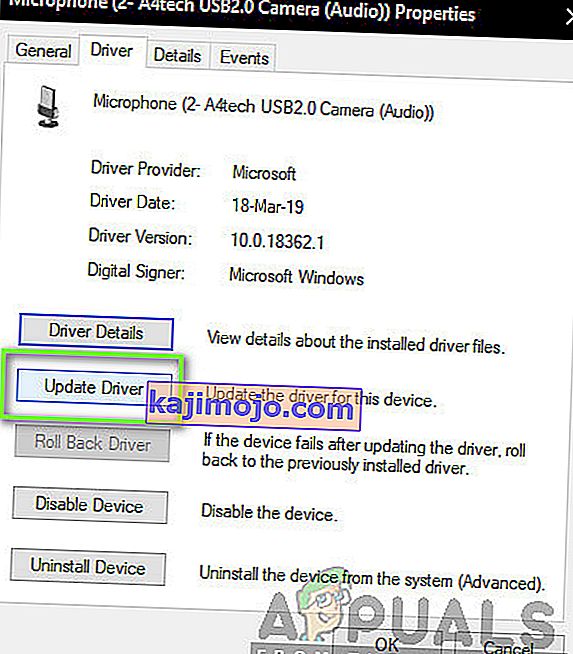
- Now click on the Drivers tab and select Rollback driver to revert the changes if any driver was installed. If it wasn’t, you can select “Update driver software”. Try using the automatic search.
- If this doesn’t solve the problem, you can uninstall the device, reboot your computer and plug the headsets back in. This way the default drivers will be installed automatically against your headsets.
If even the default drivers are not working, you can navigate to the manufacturer’s website and download the specific drivers for your specific operating system. Don’t forget you reboot your computer after you install your drivers before checking them.